Intro to and manage views on bilabl
Views on bilabl
Views on bilabl refer to customizable filters, layouts, or perspectives that allow users to easily view and interact with data. By utilizing views, you can tailor your data display to suit specific needs. This includes customizing the view to display certain columns, sorting the data in a particular order, or presenting the data in various visual formats. These features are designed to enhance your ability to understand and work with information more effectively.
On bilabl, there are two primary view modes that help visualize the user’s data: Table View and Kanban View.
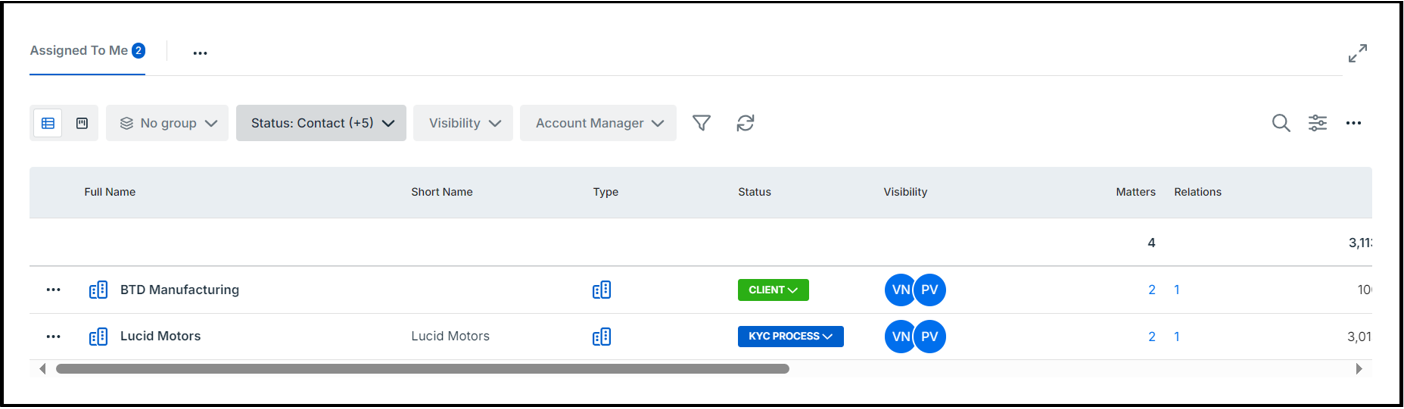
- Table View presents your data in a structured, grid-like format with rows and columns, providing a more traditional and detailed way to analyze and interact with your data.
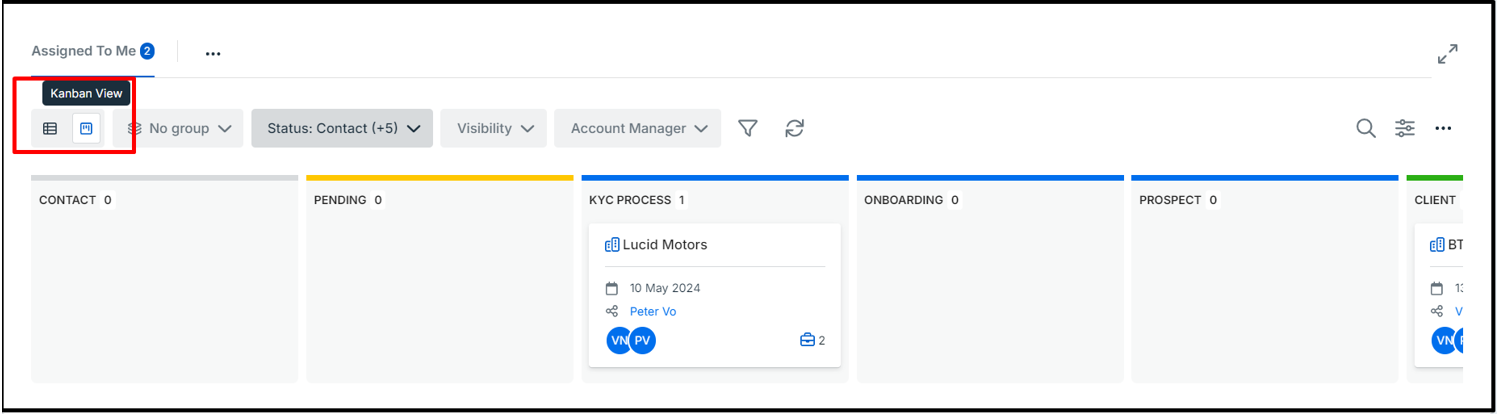
- Kanban View allows you to organize and manage tasks or data visually, using cards and columns, making it easier to track progress and workflow.
Both views are designed to support different user preferences and workflows, offering flexibility in how you manage and interpret your information on the bilabl platform.
Default views on bilabl
By default, the system provides standard views that cover clients, matters, tasks, people, and billing. These standard views include features such as your assignments (clients, matters, tasks, billing), view modes, grouping options, filters, view settings, sorting and export functions, and search capabilities.
Your assignments
In your assignments section, you can view all clients, matters, tasks, and billing items assigned to you. The system typically displays the number of each type of assignment, indicating how many clients, matters, tasks, or billing items you need to address.

View modes
You can choose how you see your data with our Table view and Kanban view options. Easily switch between these views by clicking the view mode icon.
The view mode feature is only available some certain views within the system. For more information, you can explore the details of each mode:
- Learn more about Table View mode here.
- Learn more about Kanban View mode here.
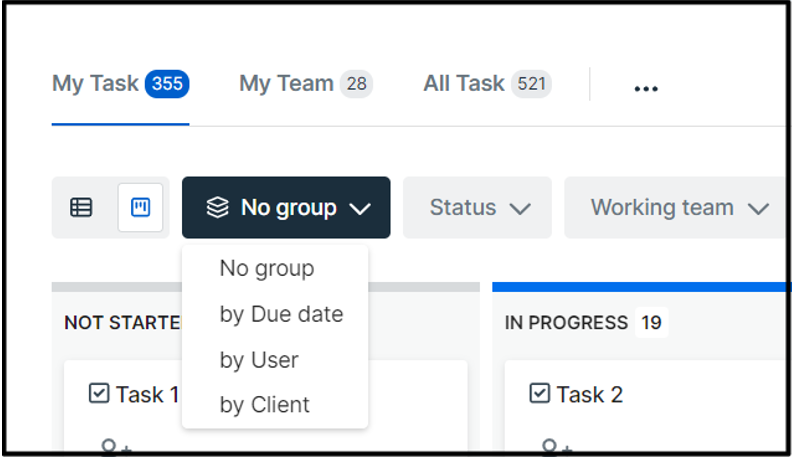
Group
To enhance visibility and streamline task tracking, you can categorize all your clients, matters, and tasks using the group button. Follow these steps.
- Access the Group Feature: Locate the group button in your interface.
- Categorize Items: Use the button to group clients, matters, and tasks as needed.
Please note that the group feature is only available on certain views.
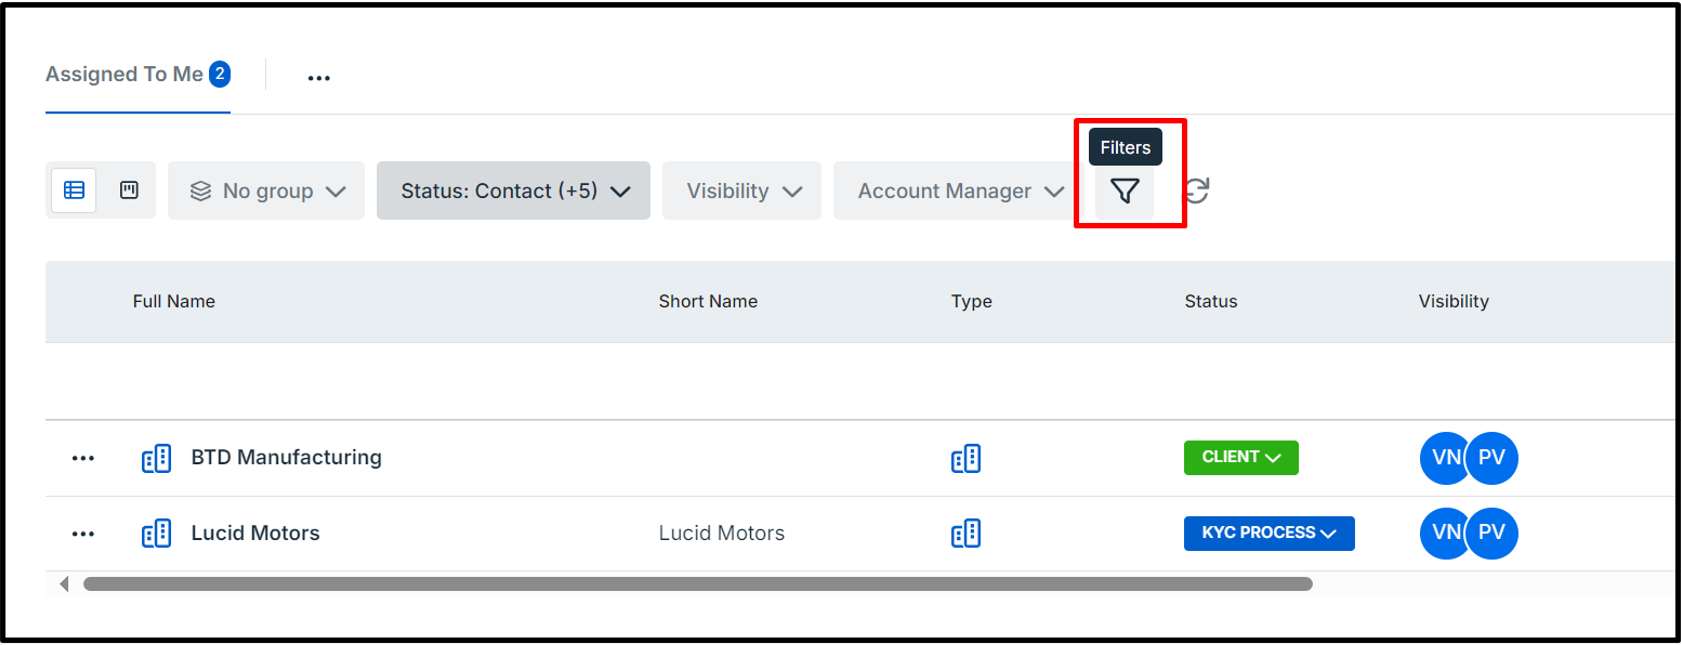
Filters
To refine your data on views. These filters help you target specific data more effectively and streamline your search process. By default, the filter options will only include the certain common filters.
To access and apply additional filter options in bilabl, locate the filter icon and select the desired filter options. This will allow you to customize your search and refine the data displayed according to your preferences.
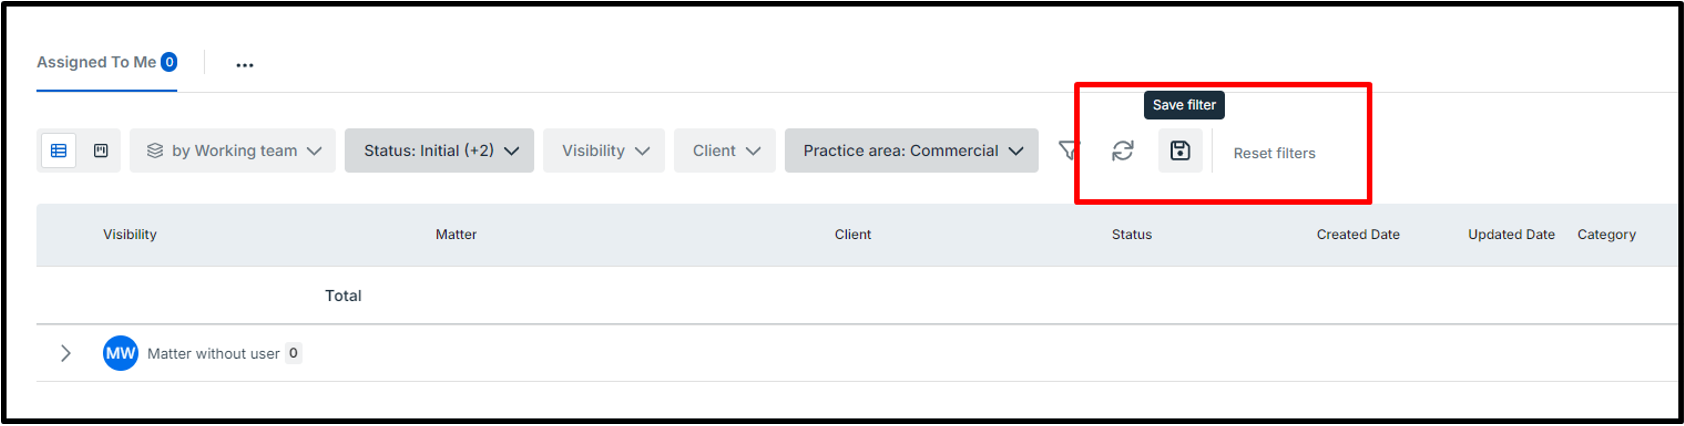
You can save your customized filter by clicking the "Save Filter" button, enabling you to quickly apply your preferred filter settings in future views.
Besides, you can quickly reset your last saved filters by using “Reset filter” button or refresh the result of the filter by clicking on refresh button.
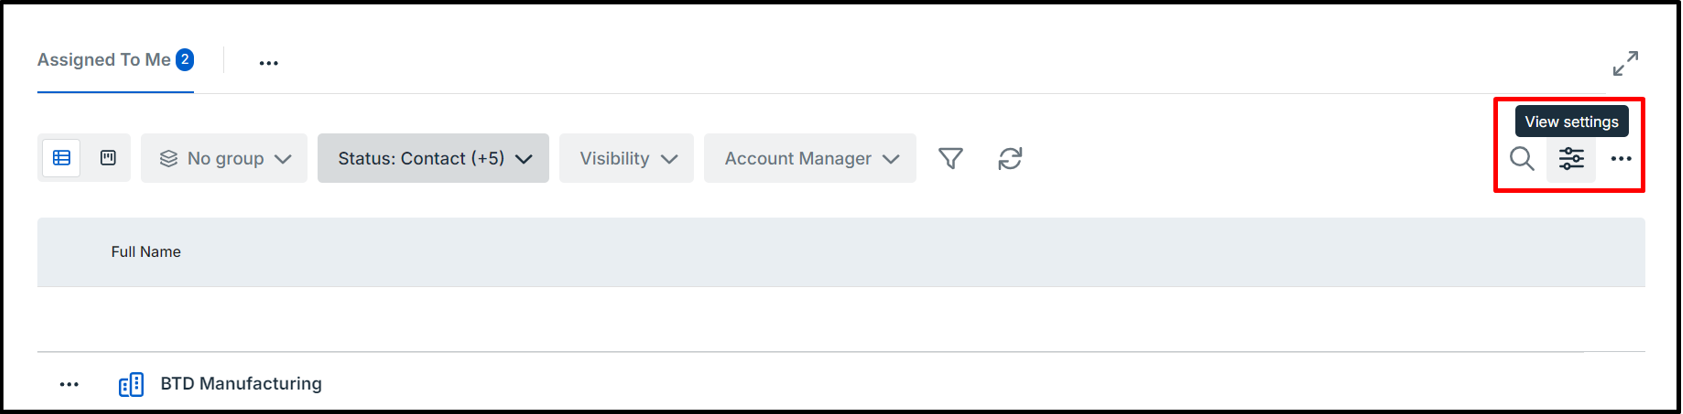
View settings
The view settings in bilabl offer flexibility, allowing you to further modify your view. This ensures you can focus on and interact with the data most relevant to your needs.
To adjust your column settings, locate and click on the view settings icon and turn on or hide the columns you want to see or remove.
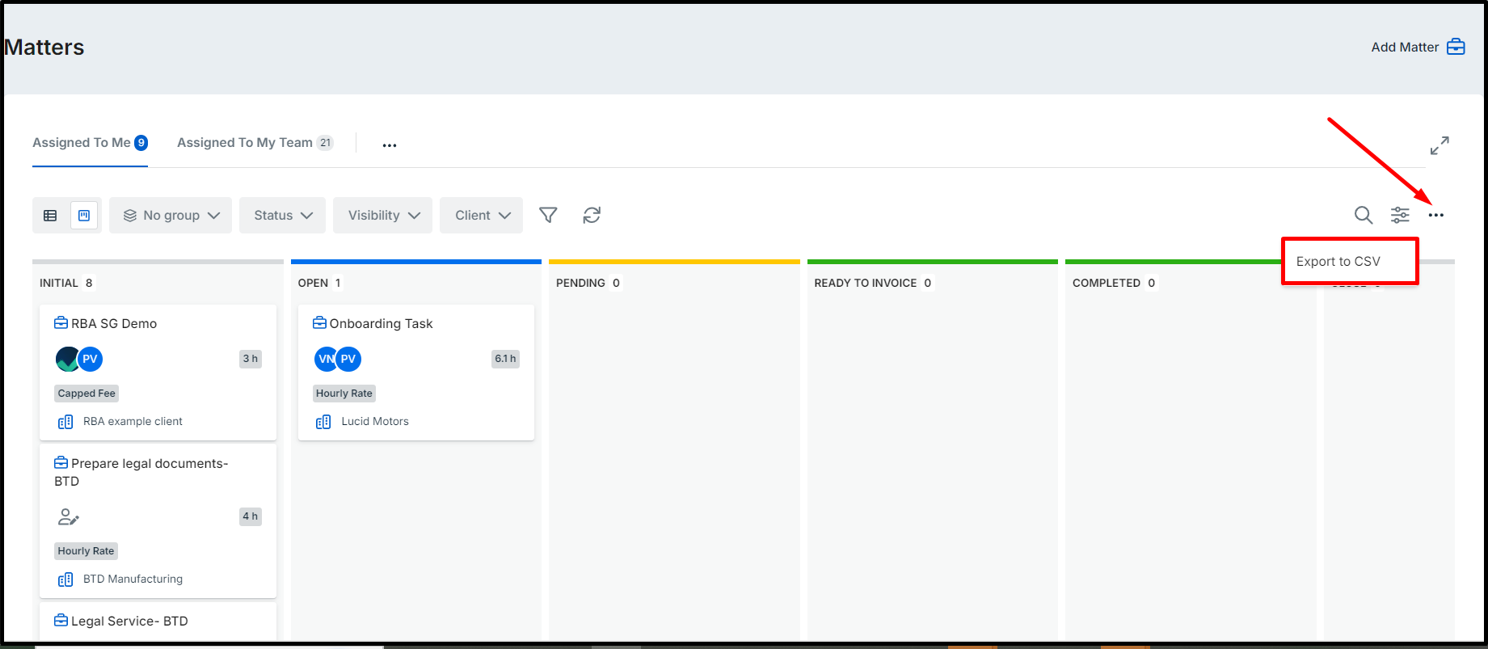
Exporting
You can export data in bilabl according to your role and permissions as below.
- User: export the data which is only assigned to you.
- Team Leader: export the data which is assigned to you and your team.
- Manager and administrator: can export all the data.
To export your data, click on “More Options” and select “Export to csv.”
Role-based default views in bilabl
To accommodate different roles and responsibilities, bilabl offers predefined default views. These views are designed to provide essential information at a glance for each user role type.
| User | Team Leader | Manager/Administrator | |
| Client | Clients are assigned to users only. | Clients are assigned to Team Leader and their team members. | Can access all clients |
| Matter | Matters are assigned to users only. | Matters are assigned to users and their team. | Can access all matters |
| Task | Tasks are assigned to users only. | Tasks are assigned to users and their team. | Can access all matters |
| Billing | Only the billing that users are working on. | the billing that Team Leader is working on and their team members. | Can access all matters |
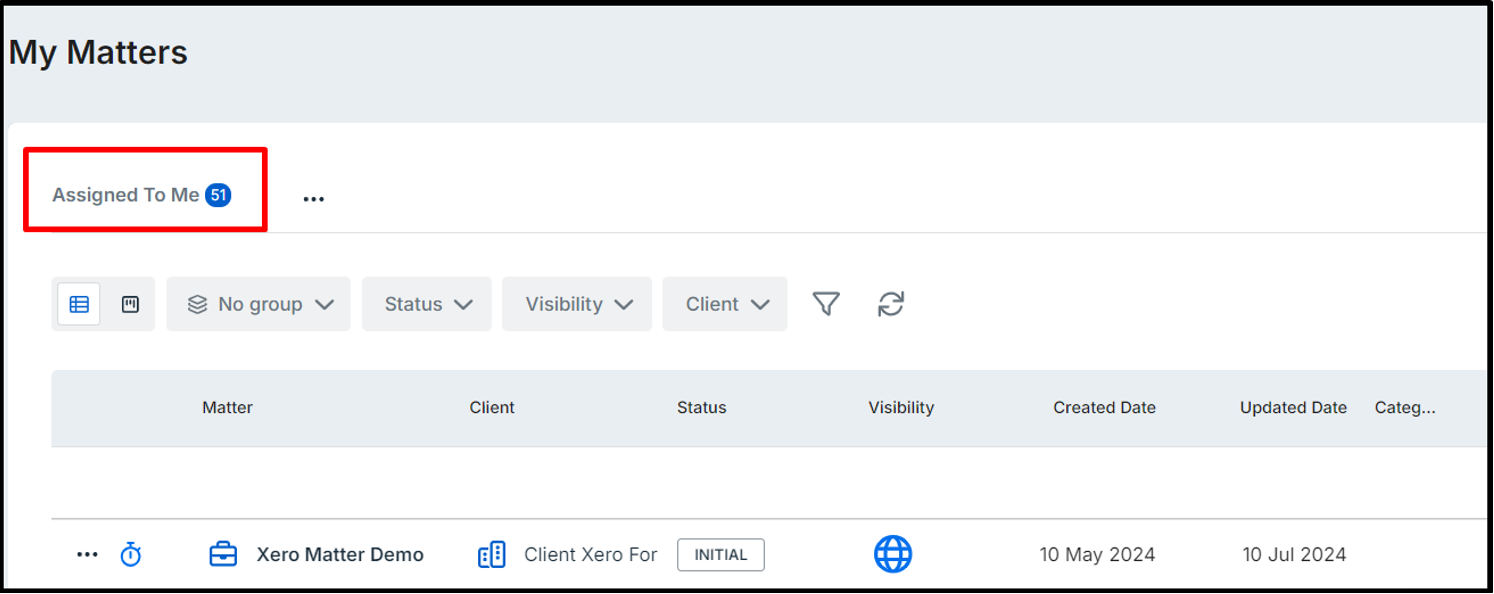
For example, users can only have the default views as “Assigned to me” if their role is User.
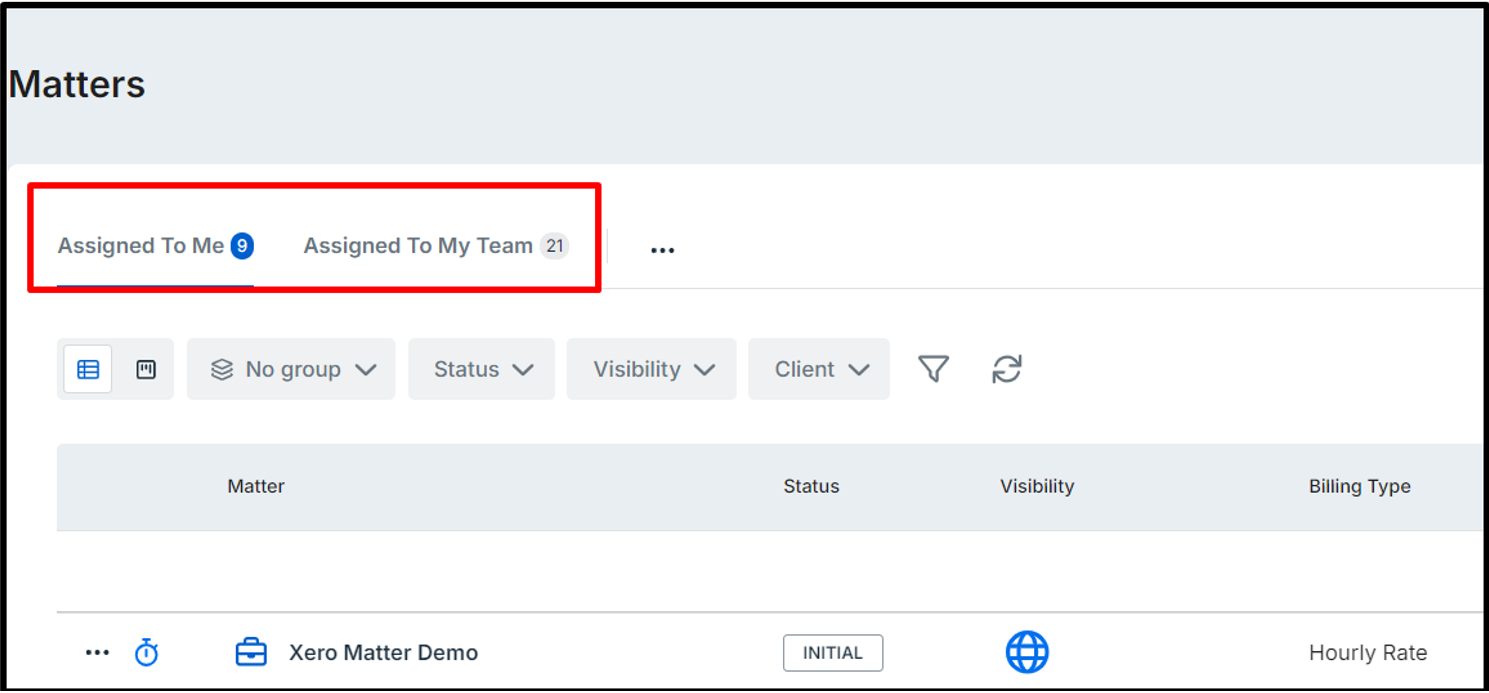
User can have two default views as “Assigned to me” and “Assigned to My team” if the user role is Team leader.
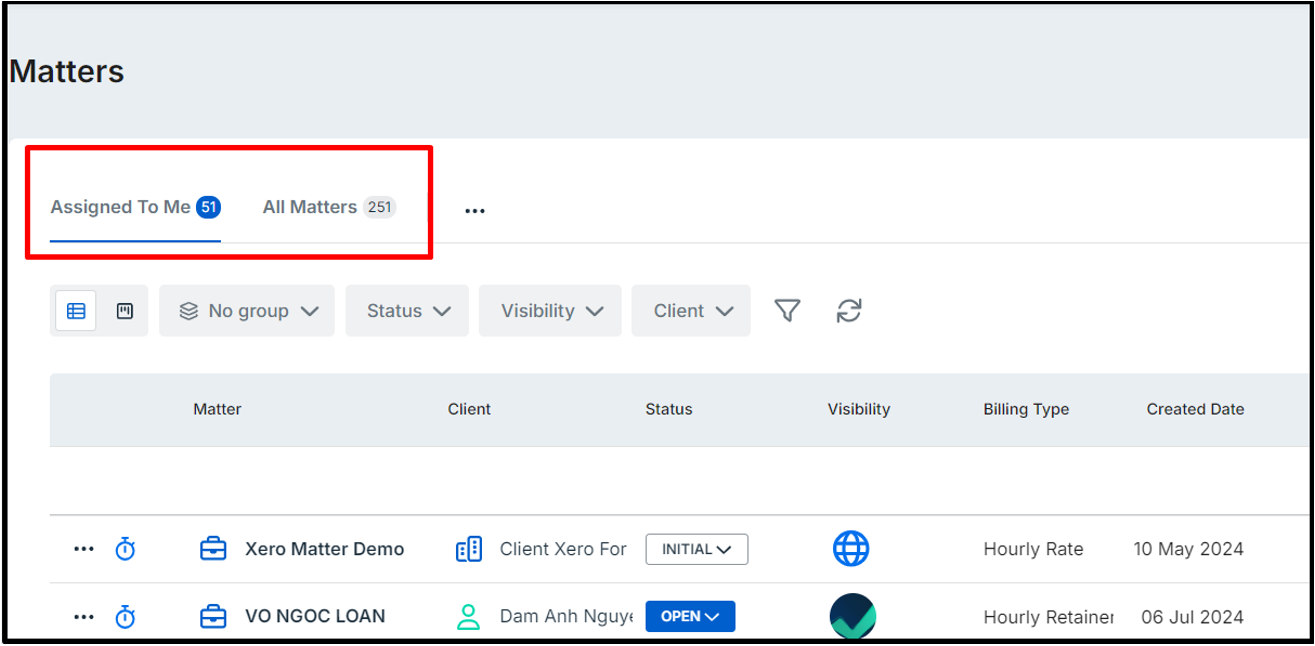
User can have two default views as “Assigned to me” and “All matters” if their role is Manager/Administrator.
Manage views on bilabl
Add new custom views on bilabl
In bilabl allows you to add new custom views, with a maximum limit of 5 custom views per user.
To add the new custom view on bilabl, please follow the steps below.
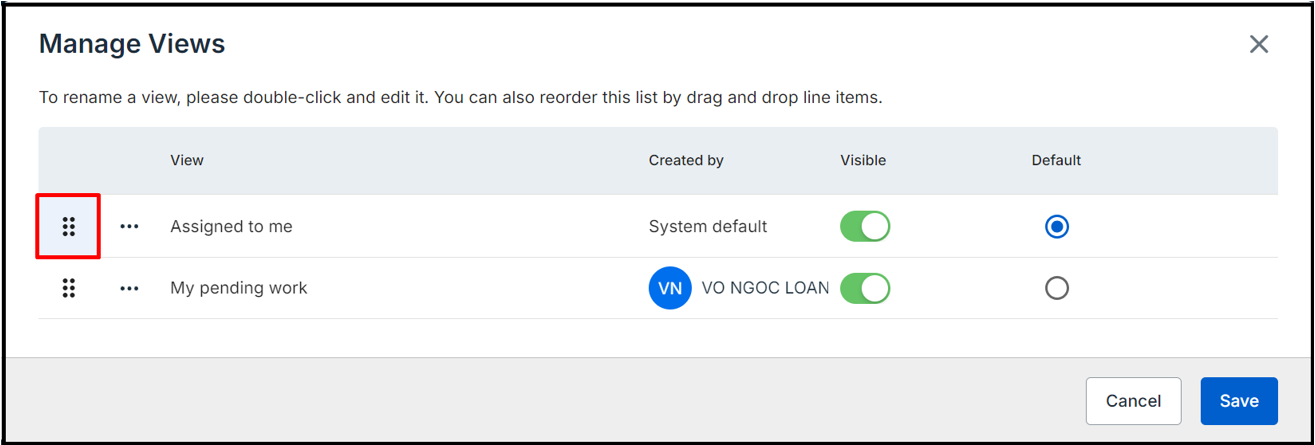
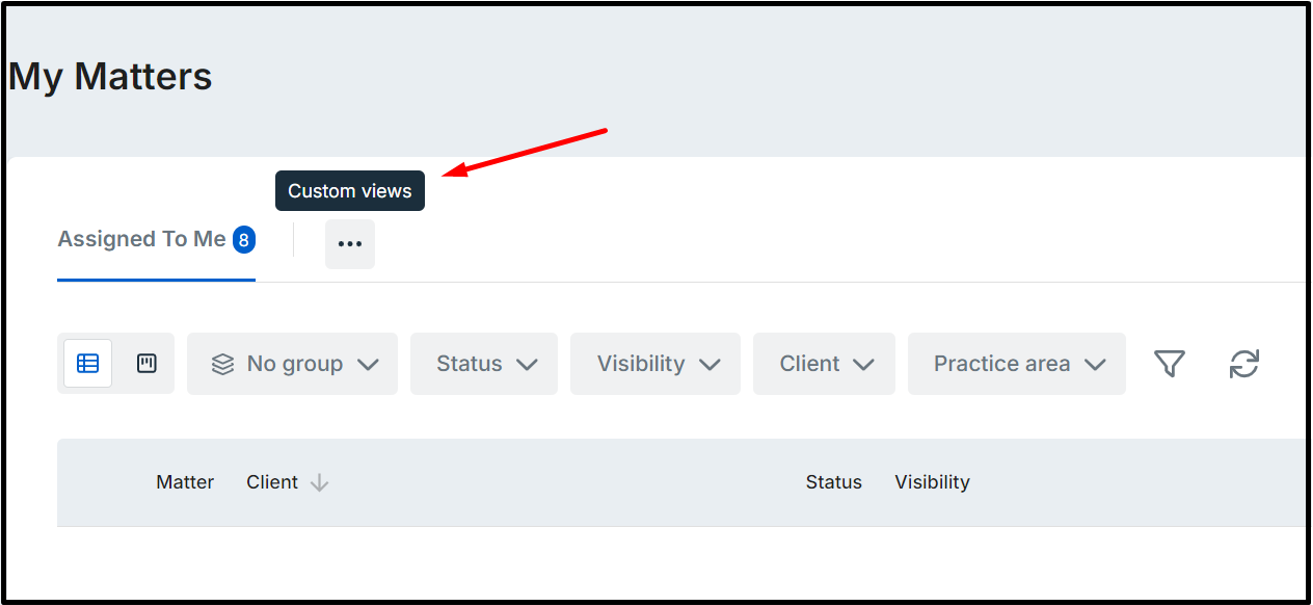
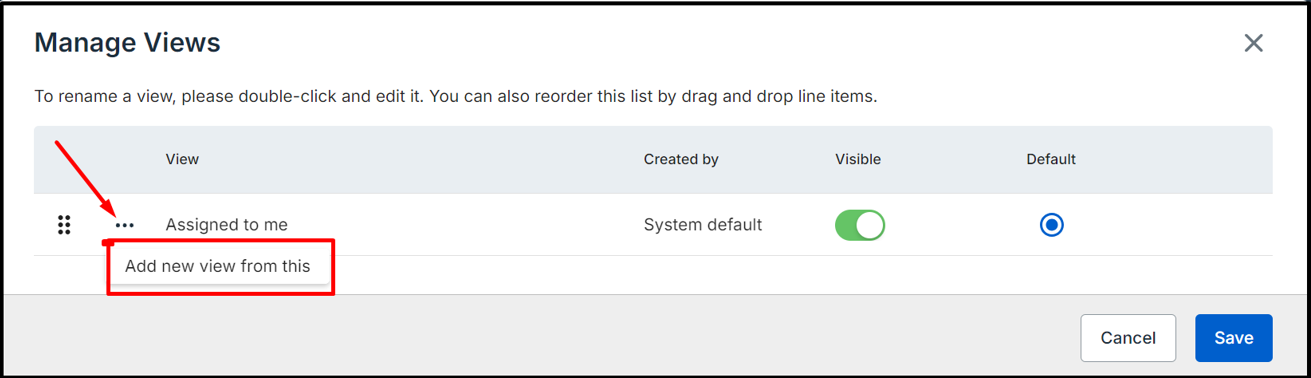
- Click on custom views in the menu. Then, select manage views. This will open the Manage Views form.
- In the “manage views” form, click on “Add new view from this”. The system will automatically create a new custom view with a name starting as "COPY."
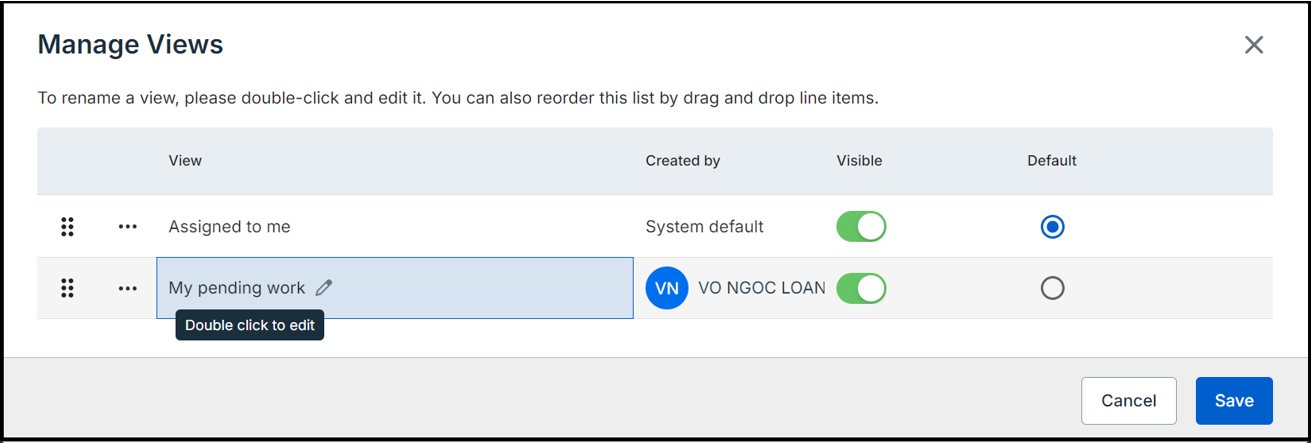
- Double-click on the newly created view's name to edit it according to your preference. Once you've renamed it, be sure to save your change. For instance, the name below has been changed to “My pending work”.
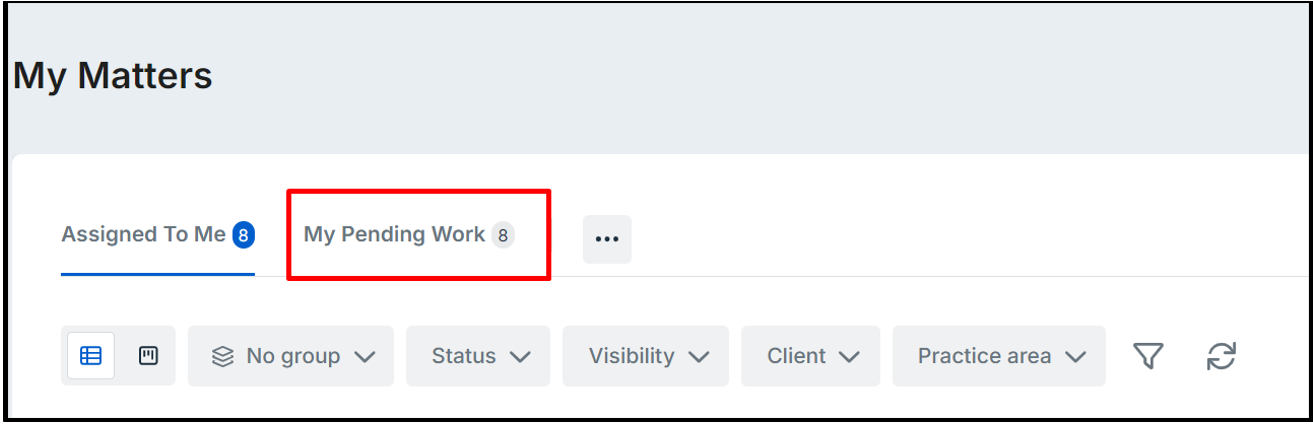
- After saving, go back to the view screen. You will now see your new custom view listed alongside the default views.
- Select your custom view and apply your desired filters and criteria to display the data as needed. Then, you need to save your new filters and settings so that your custom view is ready for use and can be easily accessed next time.
Enable and organize the views
To control which views are displayed, go to "Custom Views”, and select "Manage Views". Here, you can easily enable or disable specific views or set a default view that will be displayed automatically.
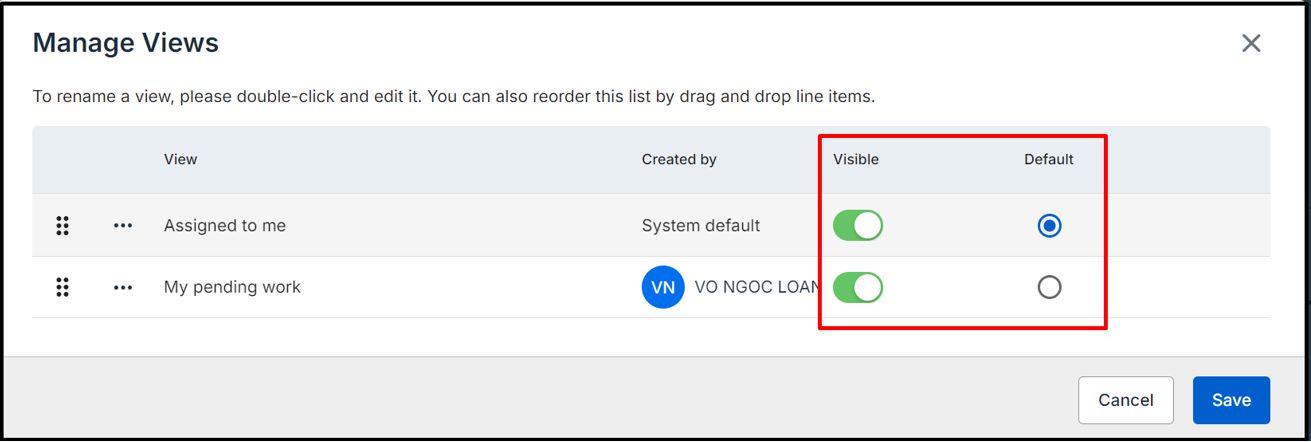
Additionally, you can also rearrange the order in which your custom views appear. To do this, simply click and hold the desired view and drag it to your preferred position within the list.