Adding Cost
Costs are categorized into two primary types: billable and non-billable. Billable costs encompass all expenses and charges accrued on behalf of a client that necessitate direct vendor payment. Typically, these expenditures are fully reimbursed by clients either progressively throughout a particular matter or upon invoicing completion. For instance, court filing fees or mediation charges fall under billable expenses. Conversely, non-billable entries in the cost pertain to tasks that will not be invoiced to clients.
Prerequisites in bilabl
To add the cost in bilabl, your permission on the matter must be at least as assistant.
Quickly view the training video below
You can add the new costs in several places within bilabl, making it a convenient way to keep on top of your cost throughout the day. It can be done by using quick add button, adding cost into the matter, adding cost to the tasks and adding cost right away on the billings. In this training session, we will guide you to add the cost by using Quick Add button which is also similar to the other places.
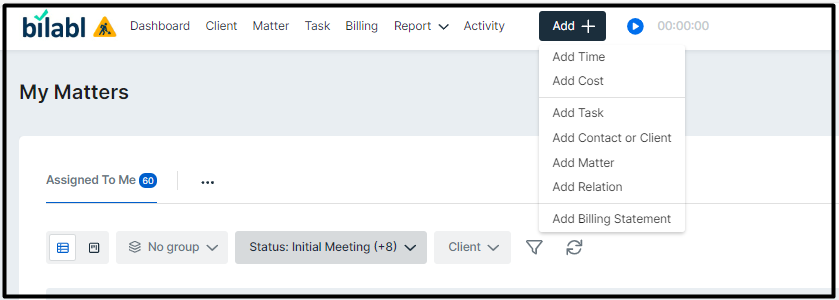
To add the cost by using the Quick Add, do the following:
- Click on Add button and choose Add Cost.
-
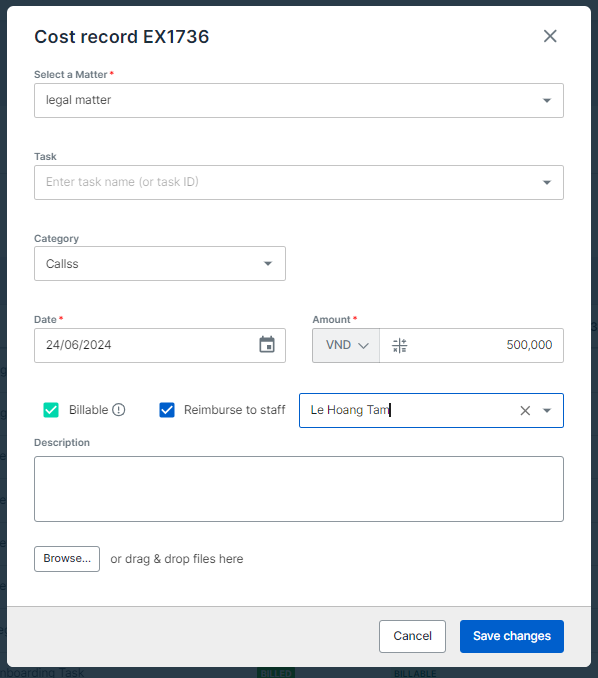
On the Add Cost screen, do the following steps.
-
Select the matter in the dropdown list.
-
Fill out the date, amount, billable or non-billable cost, description of the cost.
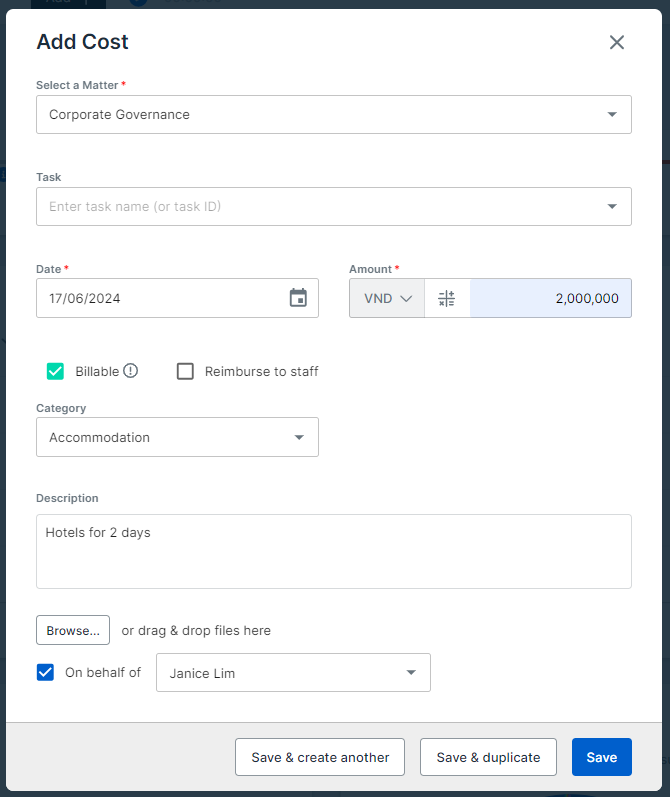
- When you’re finished, click Save.
Notes:
- When you need to reimburse a teammate who is not assigned to this matter, follow these steps:
- Check the box for 'Reimburse to staff'.
- Choose your teammate from the available options - Normally, the cost is set to billable by default. If your tasks should not be billed to a client, make sure to uncheck the billable option to mark them as non-billable.
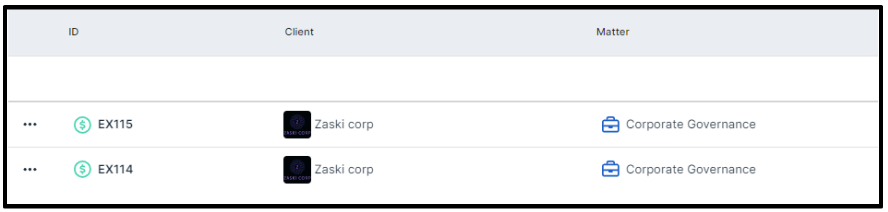
- Every submitted cost records will have the unique cost numbers for tracking purpose.
You can upload any proof to your cost.

Once the new cost record is saved successfully, it will be recorded and displayed as below.
Tips:
- You can help your teammate by submitting their cost records. Just click the On behalf of button and choose your teammate to coordinate with you.
- In case you want to continue adding the cost records, you can use the button Save and Create another.
- In case you want to duplicate another cost records for this matter, you can use the button Save and Duplicate.
Edit and Delete Cost Records
Notes:
- If you are an Associate, you are able to adjust or edit only your submitted cost records.
- Team Leader has the capability to adjust and delete their member cost records.
- Managers have the capability to adjust and delete all the cost records.
Caution:
- It is not allowed to delete the billed cost already belong to the billing.
- You can track deleted cost records in the Team activities.
Discover details on our training video of how to edit and delete the cost records here.
In case you want to adjust the submitted cost records or make some adjustments, please follow steps to check and edit the cost records.
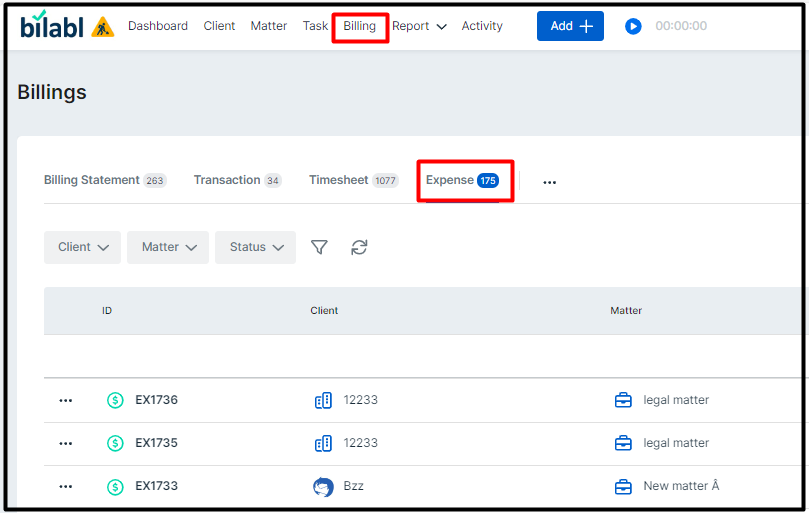
- Click on Billing tab, navigate to the Expense sub tab where you can find out all your submitted cost records.
- Locate the cost records you want to adjust and click on the unique ID.
- On the screen of the cost records, please perform the following steps.
- Click Edit to make adjustments for the cost records such as duration, amount, description, category and etc.. and click Save Changes.
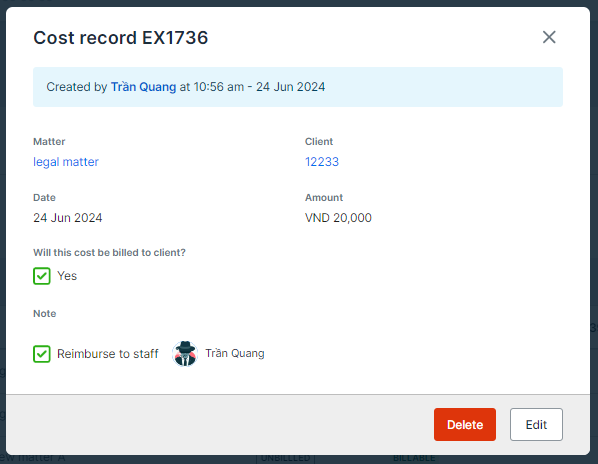
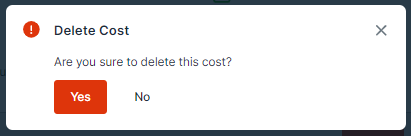
- In case you want to delete your submitted cost records, click Delete and click Yes to proceed it in the pop-up window.