Add bulk time on bilabl
In bilabl, users can add multiple time records simultaneously. This bulk time-added feature allows you to input time across various matters and tasks in a single step, saving time and reducing the risk of errors when managing large amounts of time data.
There are two methods for adding bulk time in bilabl:
- Adding bulk time directly within the system.
- Importing bulk time using the available template.
To add bulk time, please follow these steps:
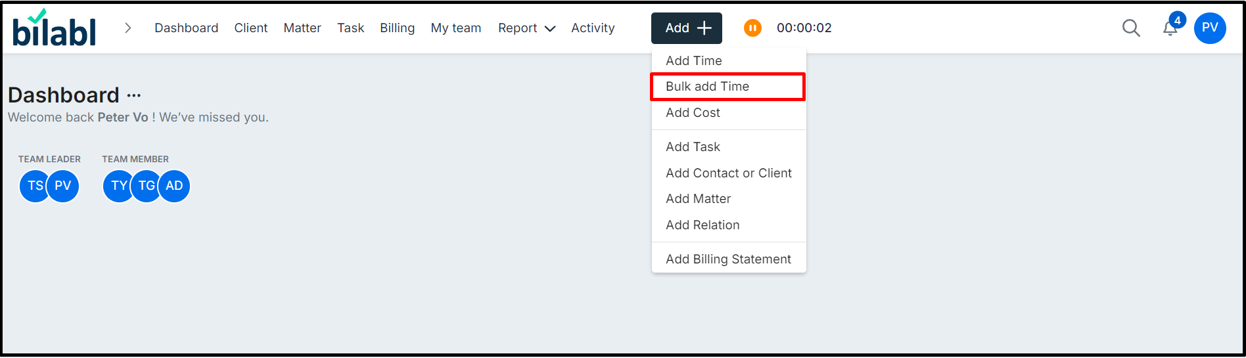
- Navigate to the Quick Add button.
- Click on Bulk Add Time.
A new window will appear, where you can input the information for your time record.
Add bulk time directly on bilabl
By adding bulk time directly, you can insert multiple time records by adding additional rows. This feature allows you to easily add, move, or delete rows and columns within bilabl. To add bulk time directly, please follow these steps:
Here is the quick training video to overview:
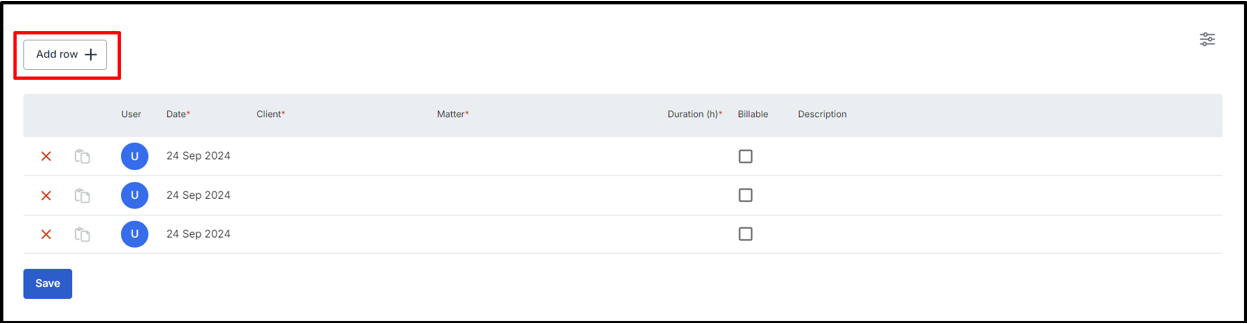
1. On the Add Bulk Time screen, you will see three default rows for entering time.
2. If you need to add more than three rows, click on Add Rows to insert additional rows.
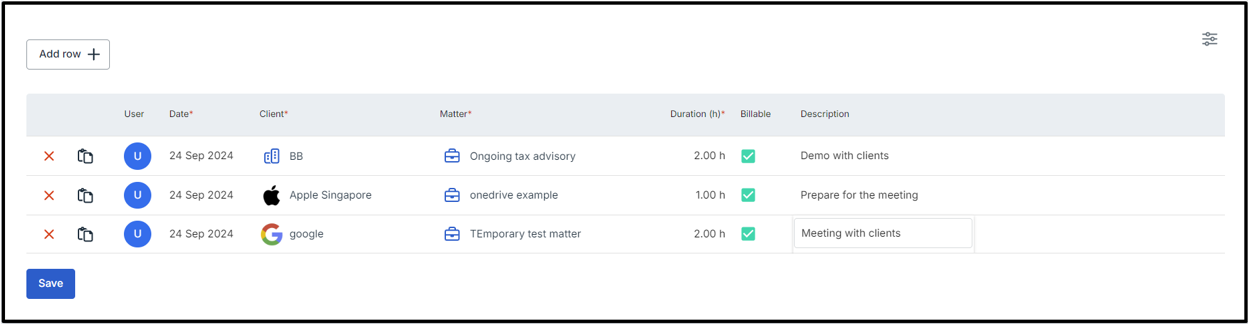
3. Next, fill in the details of your time records directly in the system. To do this, hover over the row and column where you see the pencil icon, and provide information in the following fields:
- Client and Matter: Select the client and matter related to your time.
- Date: specify the date for which you are adding time. By default, the system will adds current date.
- Duration: enter the duration of your time entry.
- Billable status: check the box if your time is billable to the client or uncheck it if the time is non-billable. However, please note that for billable matters, the checkbox is automatically ticked, while for non-billable matters, it is disabled and unchecked.
- Description: briefly describe the time record.
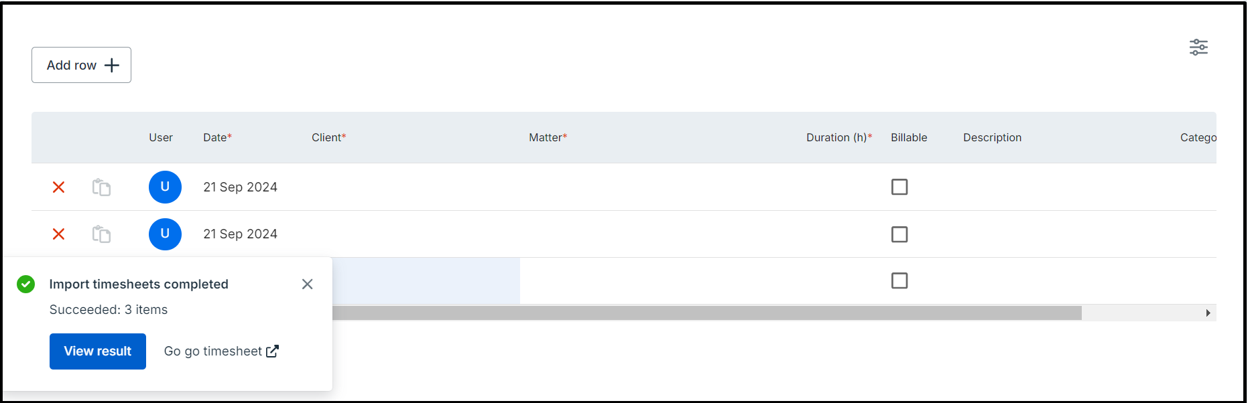
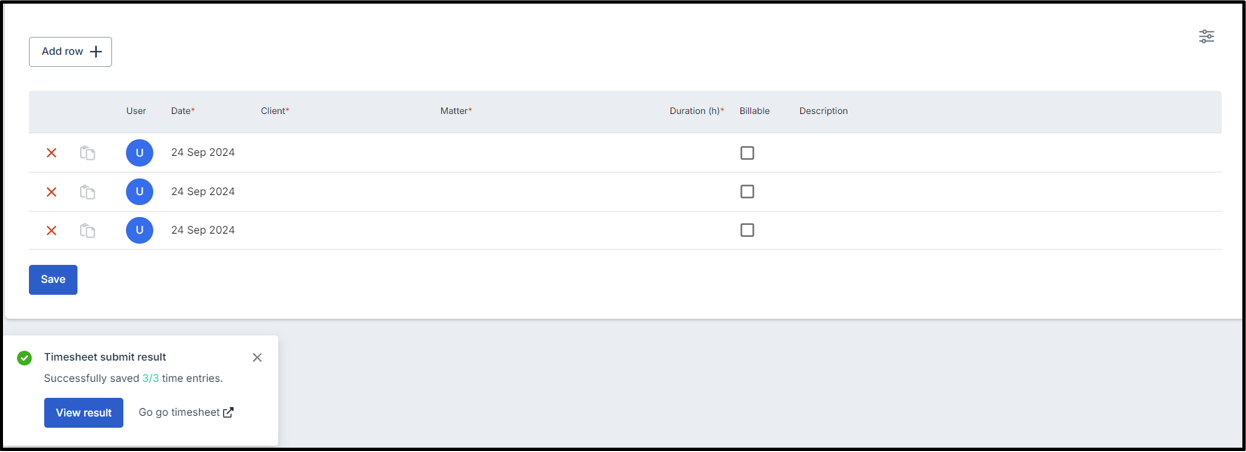
4. Finally, click Save to complete the bulk time entry. The system will process your data and display a confirmation message indicating that the import was successful.
5. After that, there are two ways to review the bulk time records you’ve submitted:
- Click on the “View Result” button to view your records immediately.
- To view all the details of the bulk time records, click on “Go to Timesheet” in the Billing tab.
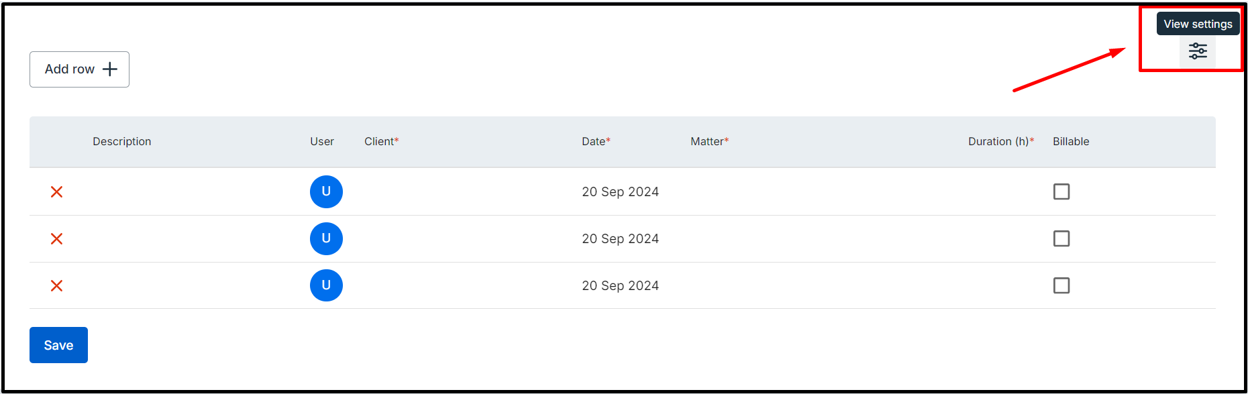
If you want to add bulk time to a task within a matter, submit bulk time for a teammate, or include category information, please follow the steps below:
- Click on View Settings.
- Turn on the necessary columns to display the options you need.
Importing the timesheet
By adding bulk time using the available template, you can download a sample file in CSV format. This allows you to enter multiple time records simultaneously. Using this method helps you import a large number of time records quickly and efficiently.
NOTE: bilabl system only supports importing up to 1000 record per time.
Here is the quick training video to overview:
To add the bulk time via template, please follow the steps below:
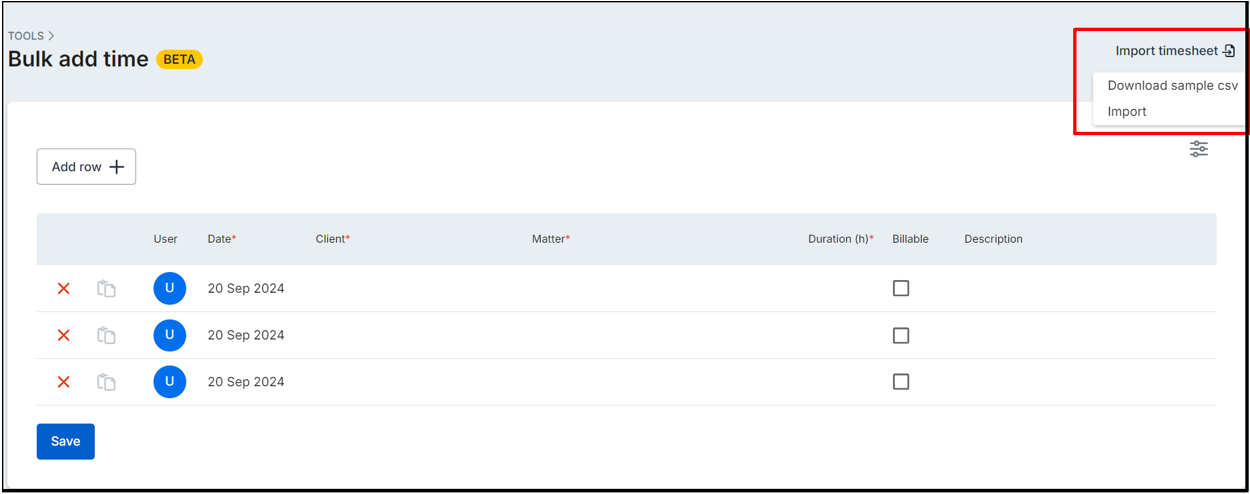
1. On the Bulk Add Time screen, click on Import timesheet located on the right-hand side.
2. Click on Download sample csv file to obtain the template for adding your time entries.
3. Open the downloaded CSV file and fill in the required information in the appropriate rows and columns.
Mandatory columns:
- Client: Enter the client’s name exactly as it appears in bilabl.
- Matter: Input the matter related to this client using the correct name in bilabl.
- Duration: The default unit is hours. To add duration in minutes, format your entry as 30m, 14m, 6m, etc.
- Date: Enter the date for the time record using the format YYYY-MM-DD.
Optional columns (Leave it blank if it’s not applicable):
- Description: Provide details about your time records.
- On behalf of: Enter your teammate's name exactly as it appears in bilabl.
- Task: Input the correct task name associated with your matter.
- Category: Enter the category for your matter that already exists in bilabl.
- Billable: Enter "2" to indicate that your time is billable to the client. Leave the field blank for non-billable time records.
4. Return to the bilabl site, click the Import button under Import timesheet, and select the CSV file to upload your bulk time records.
5. The system will process your data and display a confirmation message indicating that the import was successful.
6. There are two ways to review the bulk time records you’ve submitted:
- Click on the “View Result” button to view your records immediately.
- To view all the details of your submitted bulk time records, click on “Go to Timesheet” in the Billing tab.