Add billing statements on bilabl
In bilabl, there are two methods for creating bills: Quick bills and Billing Statements.
- Quick bills: you can generate a single bill immediately without needing to pre-enter the information. The information can be added on the fly as you create the bill.
- Billing Statement: generate bill for items that were previously logged but remain unbilled.
To generate billing statements on bilabl, the client must have at least 01 billable matter. Please follow the steps below to generate a billing statement.
Billing configuration
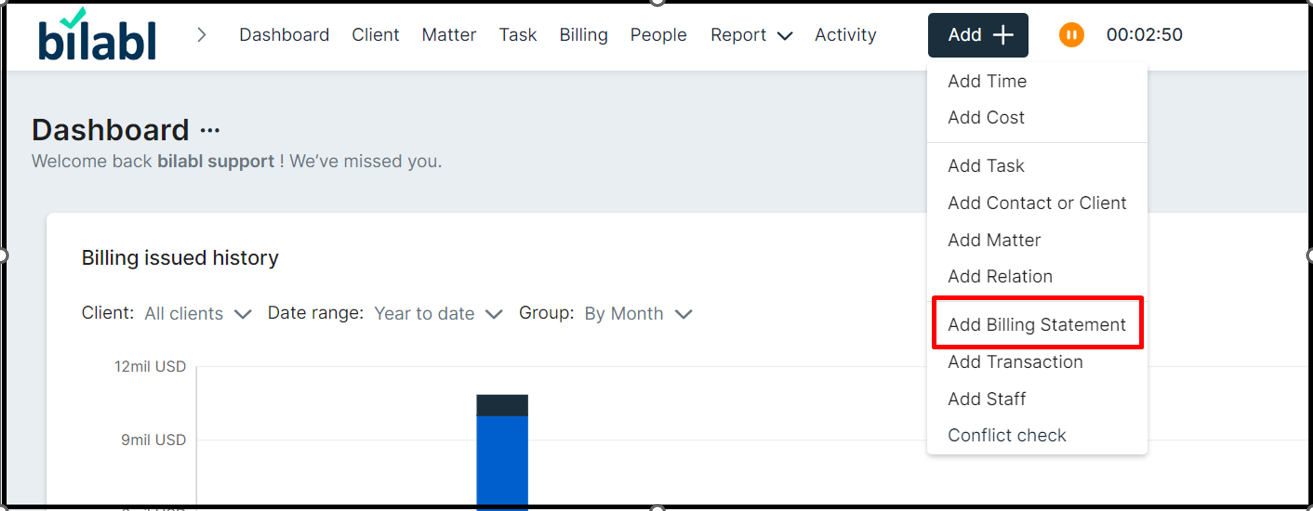
1. On the top menu, click on the quick add button to open Add billing modal.
2. On the billing configuration screen, select a client from “Bill to” field. Please note that you can only bill Clients that are not “Archived” or “Conflict”.
3. By default, the system will use the client's preferred currency for billing. If your billing is in a different currency, you can select your desired currency, and the system will allow you to adjust the exchange rate accordingly.
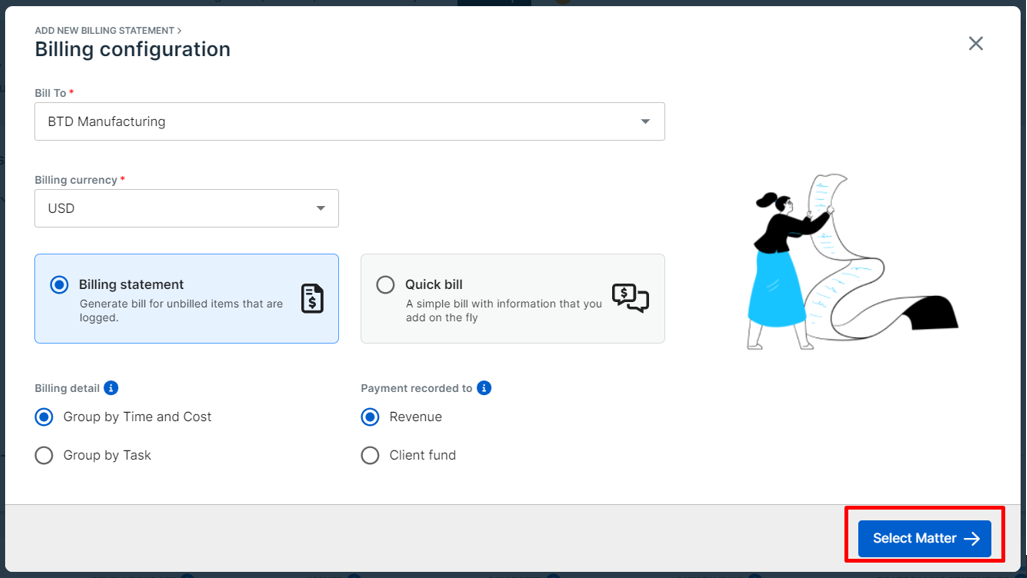
4. To continue adding the billing statement, please choose the "Billing Statement" option.
5. There are two options for billing details grouping: by Time and Cost or by Task.
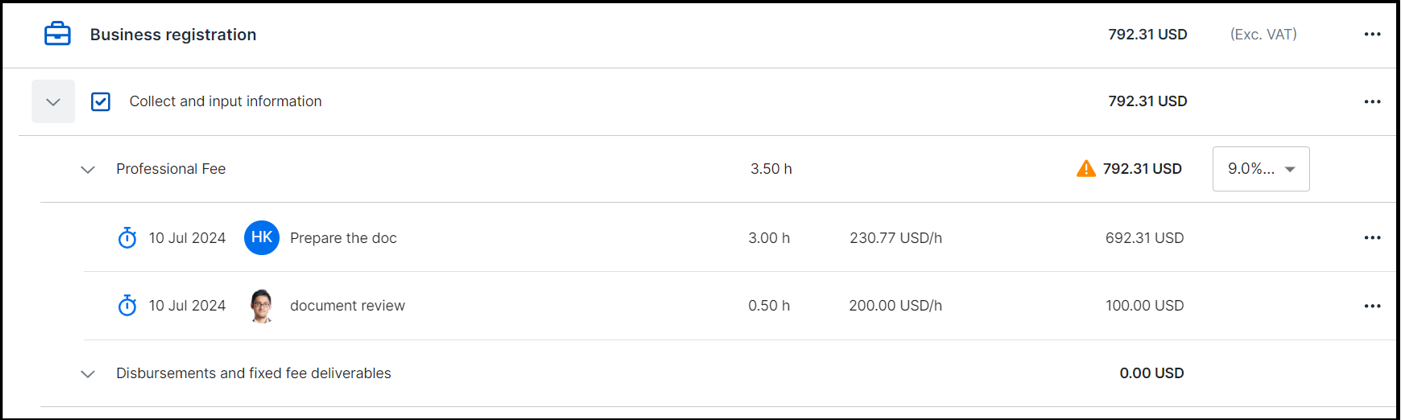
- If you choose to group by time and cost, the billing details will be categorized into professional and disbursement fees. The billing will include all unbilled time and cost records for the selected matters, as shown in the example below.

- If you choose to group by task, the billing details will be displayed according to the task and under each task, you can also see the time and cost records under the professional and disbursement fee respectively.
6. Next, you need to determine whether the payment will be recorded as revenue or to the client fund. Then, click on select matter.
Select matter
1. On the select matter screen, you will see the matters belonging to the clients. Click on the matter for which you want to generate the billing.
2. By default, the system displays all non-archived matters. If you don't see the matters you're looking for, you can manually adjust the matter status settings to find the desired matters.
Additionally, the system will automatically collect timesheets and expense records logged from the beginning of the current year to date. You can manually adjust the date range to update the bill period.
3. Click "Generate Billing Details” to generate the billing statement. After successfully creating a new bill, you will be redirected to the billing detail page to continue your editing.

4. If your billing statements detail are grouped by task, you can select the specific tasks you want to bill by clicking the dropdown menu next to the matters.
Edit the billing statement details
After adding the billing statement, the system automatically redirects you to edit the billing detail. Follow the steps below to edit the billing statement details:
Editing billing configuration
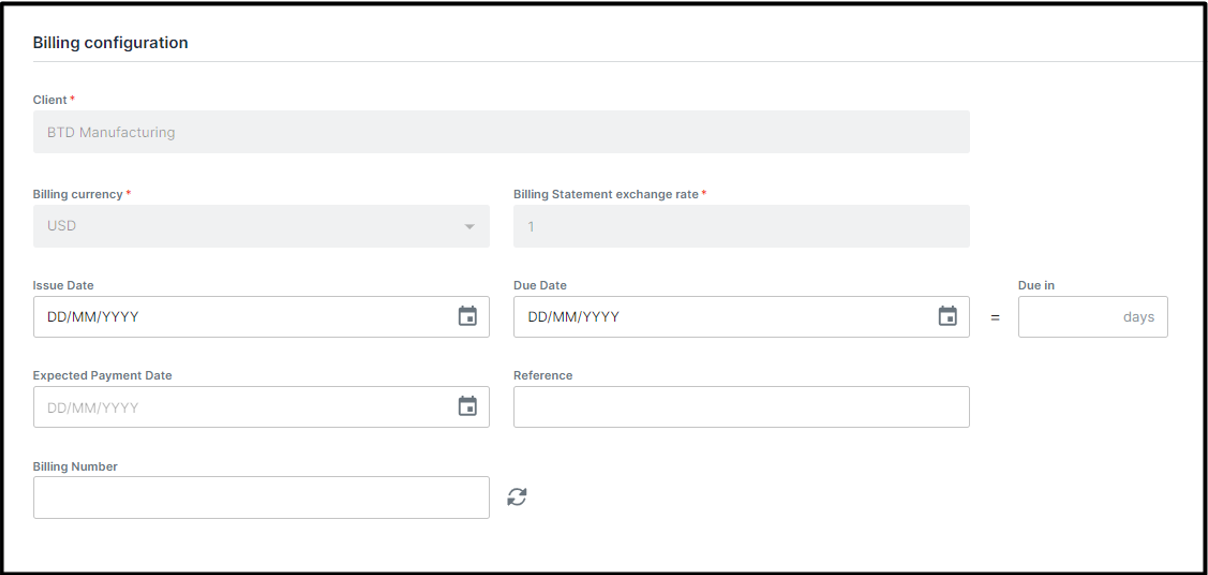
Please add the important following information on the billing details:
| Issue date | This is the date that the bill is issued. You can select any date. |
| Due date | This is the date that the bill is due. You can manually select a date, or you can input the due in. |
| Due In | The amount of time remaining until a payment is required or expected to be completed. |
| Expected Payment Date | The date by which you expect your clients to make payment. |
| Billing number | This is a unique number. You can set it manually or have it automatically filled. |
| Reference | Flexible fields that allow you to customize per your own purpose. Example: You can use this field as the order number…. |
Editing billing details
Within the billing details section, you can edit essential matter-related information. This includes the ability to add, edit, and update specific details.
Editing the professional fee
A professional fee reflects the time records documenting the efforts expended by users in handling matters on behalf of clients.
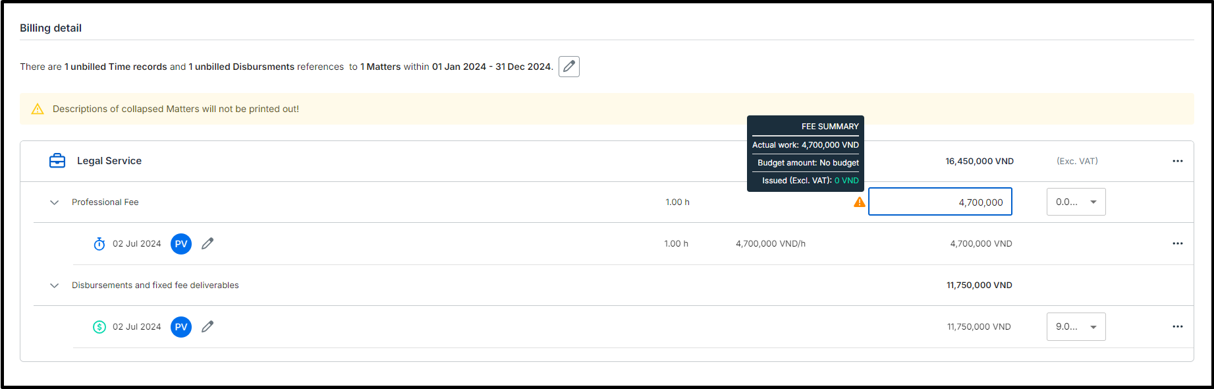
- In the billing details, you can directly edit the professional fee by double-clicking on the fee amount and making changes. Additionally, you can view a summary of the fees, which includes the actual work done, the budgeted amount, and the issued amount (excluding VAT). This gives you a comprehensive overview of the matter and its billing details.
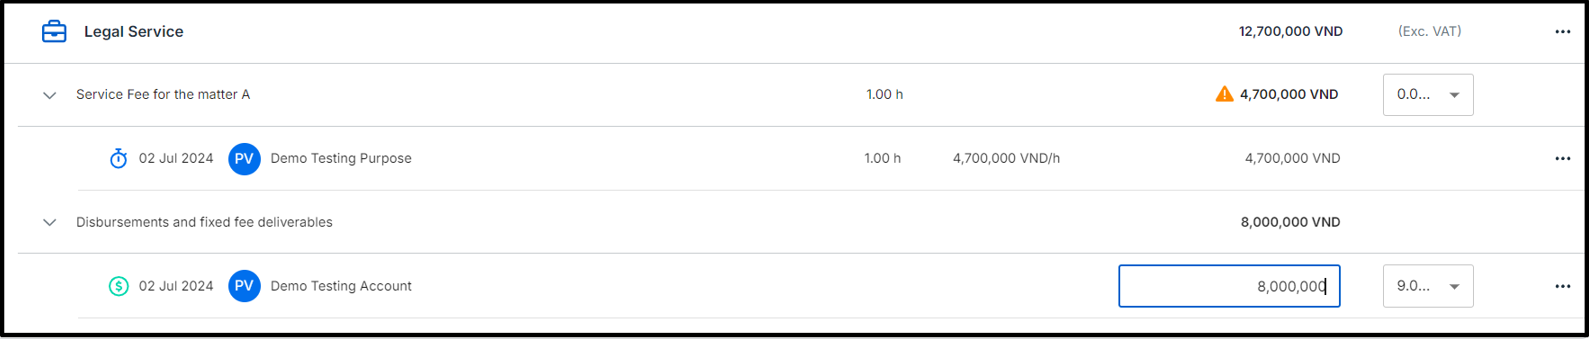
- Moreover, you can customize the name of the fee. Double-click on "Professional fee" to change it to a different name. For example, the name has been changed to “Service Fee for the matter A”.

- You can directly edit time records within the billing details. Double-click on a time record to change its name, duration, or hourly rate. The system will automatically recalculate the fee based on the updated information.

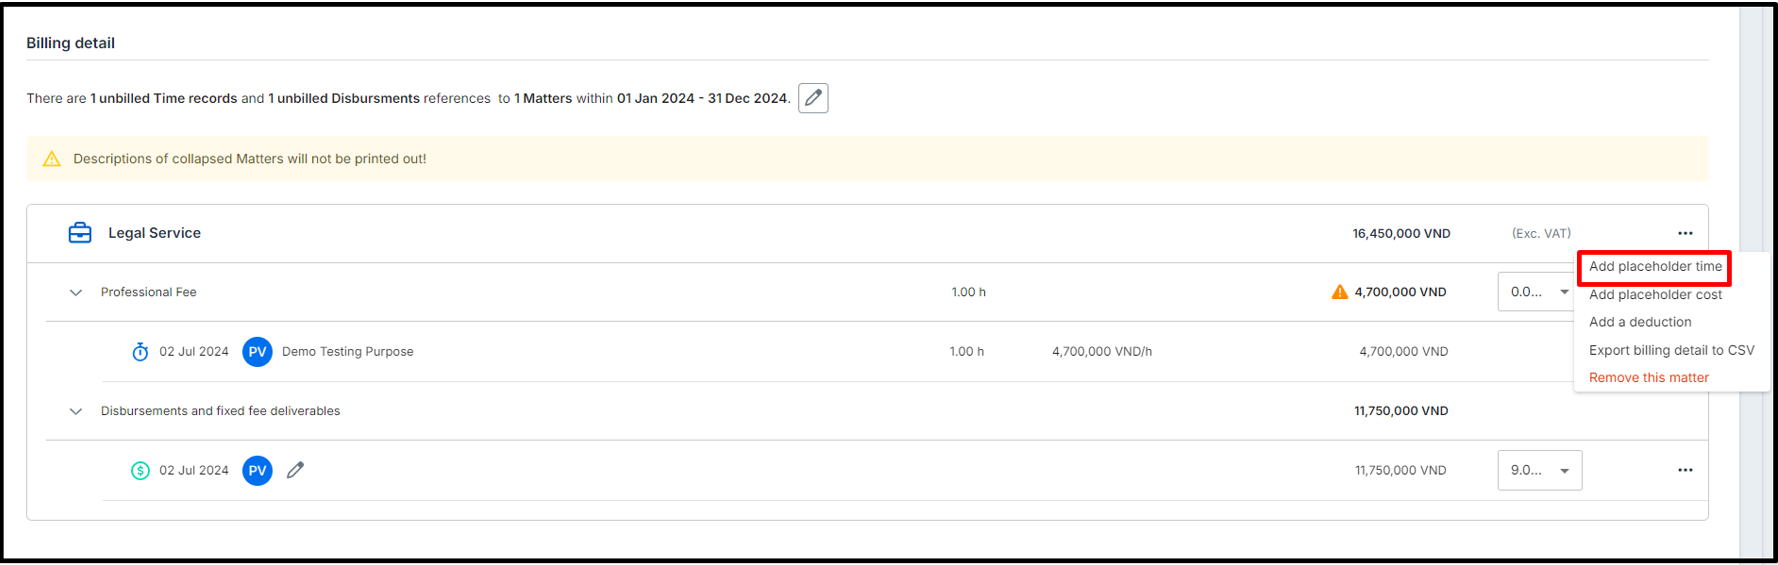
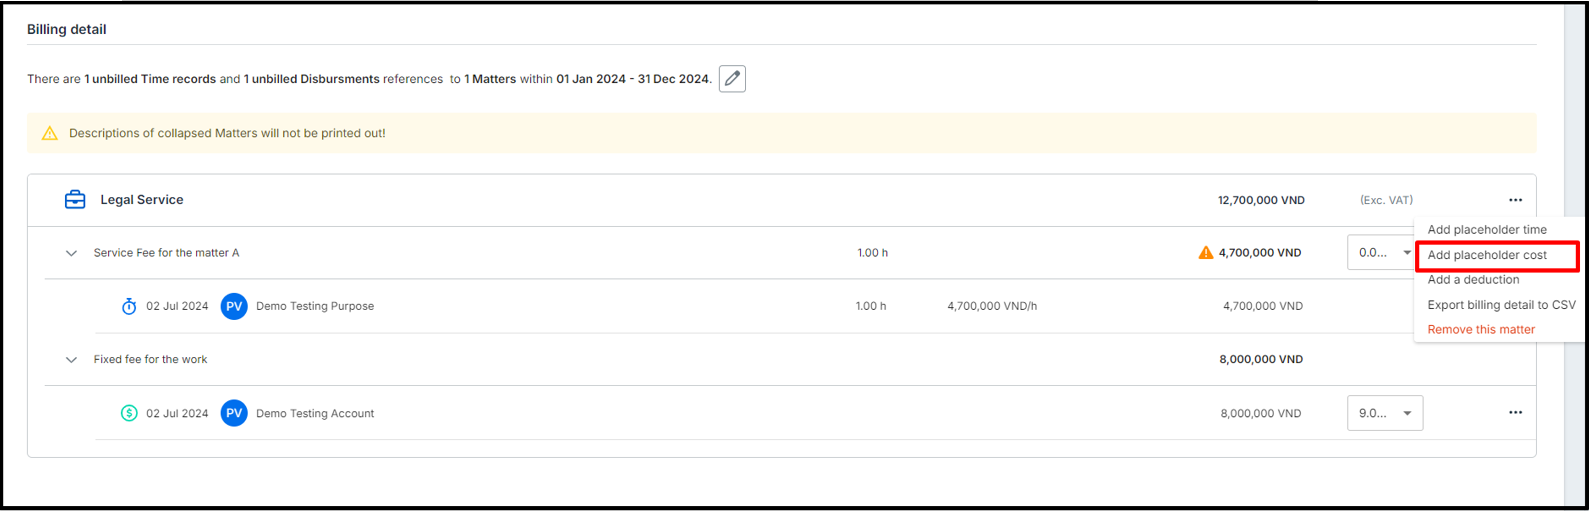
- On the billing, you can add a temporary time entry, which is used when you don't have all the details for a time-based service yet. This record is only for the current bill and doesn't affect other records. To add the temporary time records on the billing, click on "More options" and select "Add placeholder time."
- Additionally, you can view the time records again by clicking "View Original".

Editing the disbursement fee
Disbursement fee is expenses or costs incurred on behalf of clients, separate from professional service fees, covering expenses like court filings, travel, expert witnesses, photocopies, and related case costs.
- You can directly edit cost records within the billing details. Double-click on a cost record to change its name, amount. The system will automatically recalculate the fee based on the updated information.
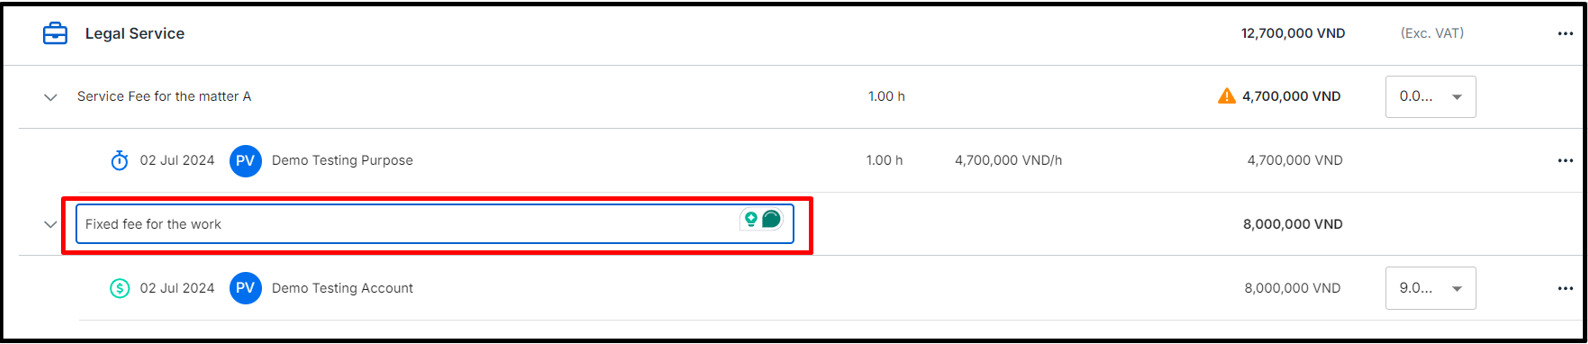
- Moreover, you can customize the name of the fee. Double-click on "Disbursements and fixed fee deliverables" to change it to a different name. For example, the name has been changed to “Fixed fee for the work” as below.
- On the billing, you can add a temporary cost entry, which is used when you don't have all the details for a cost-based service yet. This record is only for the current bill and doesn't affect other records. To add the temporary cost records on the billing, click on "More options" and select "Add placeholder time".
- Additionally, you can view the cost records again by clicking "View Original". From this view, you can directly edit the cost records.

Applying VAT
To apply the VAT on the billing, click on the VAT rate dropdown list and select your desired VAT rate from the available options.

If you need to add a new VAT rate to the dropdown list, please contact your administrators, who have the authority to update or change VAT rates on the system setting.
Adding deduction
In case you need to add the discount to the billing, please follow the steps below.
- Navigate to the matters where you want to apply for the discount.
- Click on the "More Options" section.
- From the dropdown menu, select "Add Deduction."
- Enter the details of the discount and save your change.

Adding notes or reminders
To add notes or reminders to the billing details, follow these steps:
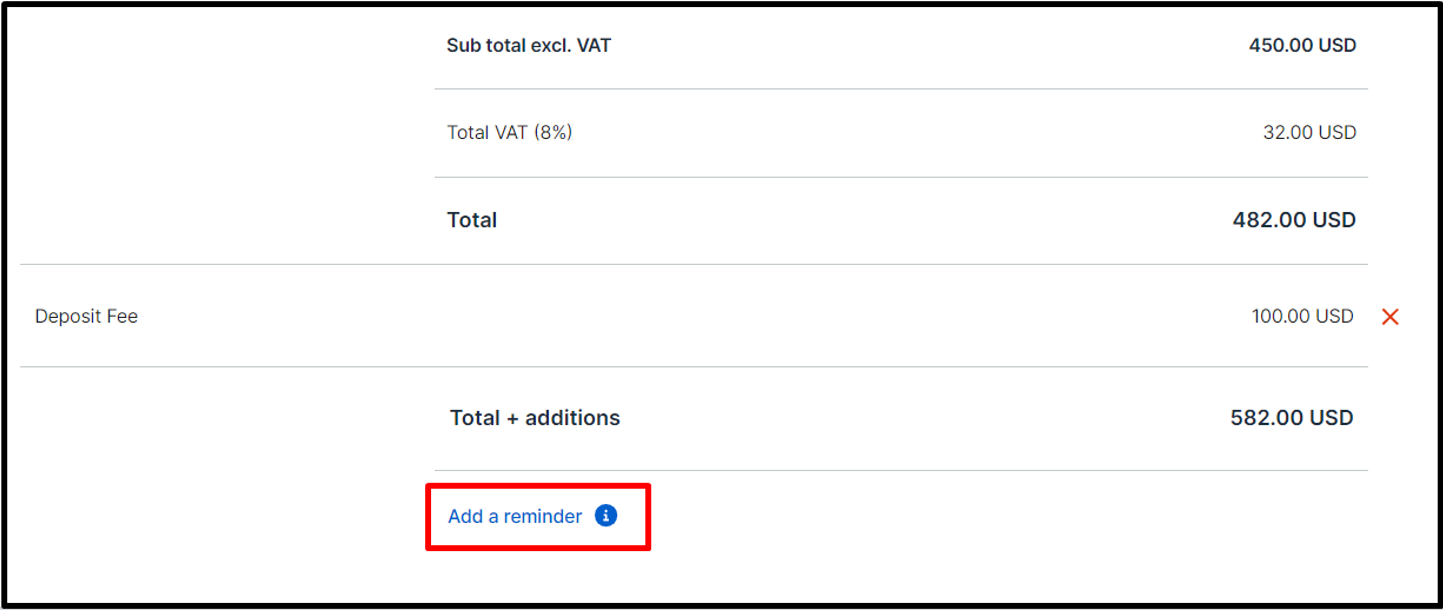
- In the billing details, locate and click on the "Add Reminder" button.
- Enter the relevant notes or reminders as needed.
Please note that while these notes or reminders are useful for keeping track of important information, they will not be included in the total report or affect the final billing amounts.
Export setting
The export setting section primarily consists of three key components: Bill from, Bill to and billing template details. You can edit essential information within these sections, including adding, editing, and updating specific data points as needed.
Editing Bill from
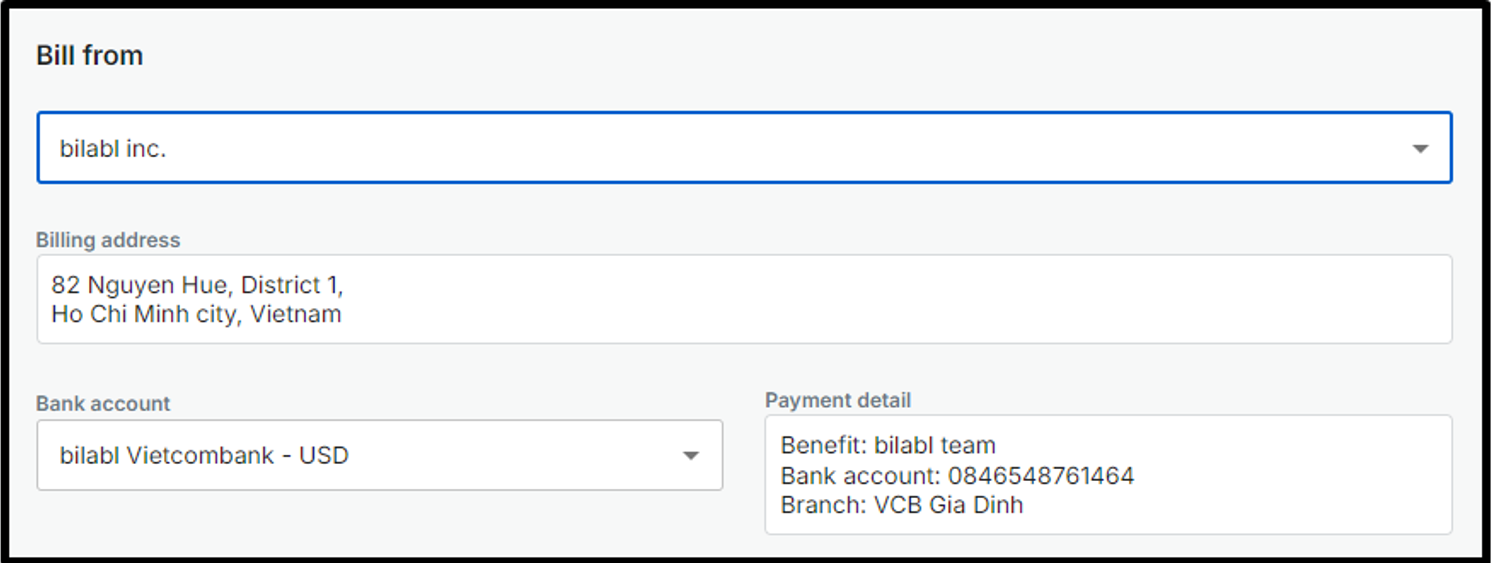
The "Bill From" section specifies the sender or entity issuing the bill. It consists of the following details:
- Billing address: the location where the bill is sent from. This is typically linked to the payment method.
- Bank account: the bank account number where payments are deposited.
- Payment details: detailed payment information such as account name, account number, and SWIFT code.
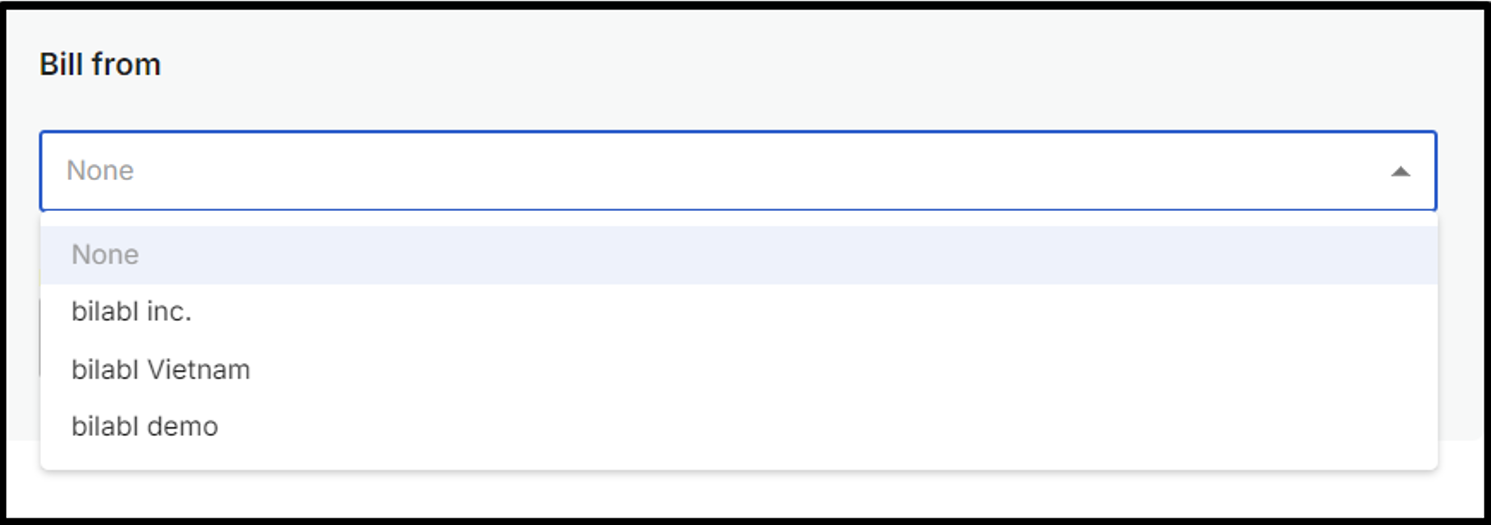
To edit the "Bill From" information, click on the "Bill From" field and select the desired option from the dropdown menu. The corresponding billing address, bank account, and payment details will automatically populate.
To add the new bill from information, please contact your administrators, who have the authority to add the new bill from information in the system setting.
Editing Bill to
The "Bill to" section identifies the recipient of the invoice. It consists of the following details:
- Paying entity is the individual or organization responsible for making a payment. This entity provides the funds for a transaction or settles an invoice and can be different from the client of the billing.
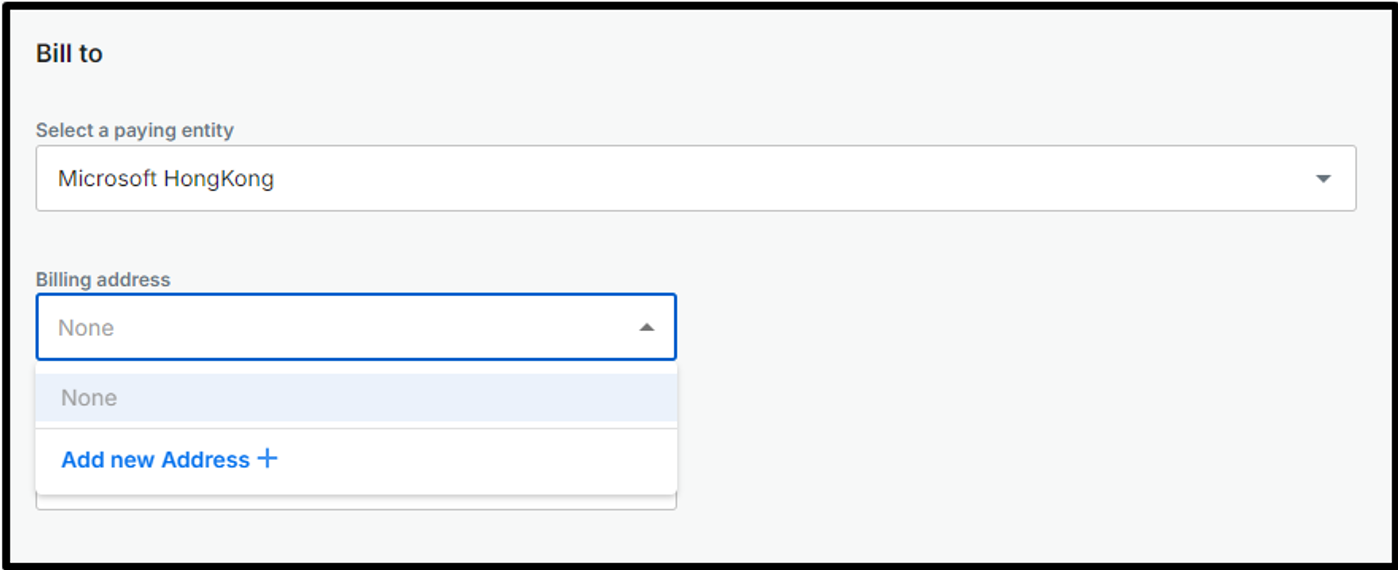
- Billing address is the location where the bill is sent to. This is typically linked to the payment method. The billing address of the bill to is normally generated from the client address.
- Billing recipient is the individual or entity designated to receive billing. The billing recipients could be different from the client of the billing.
To edit the paying entity, click on the "Paying entity" field and select the desired option from the dropdown menu.
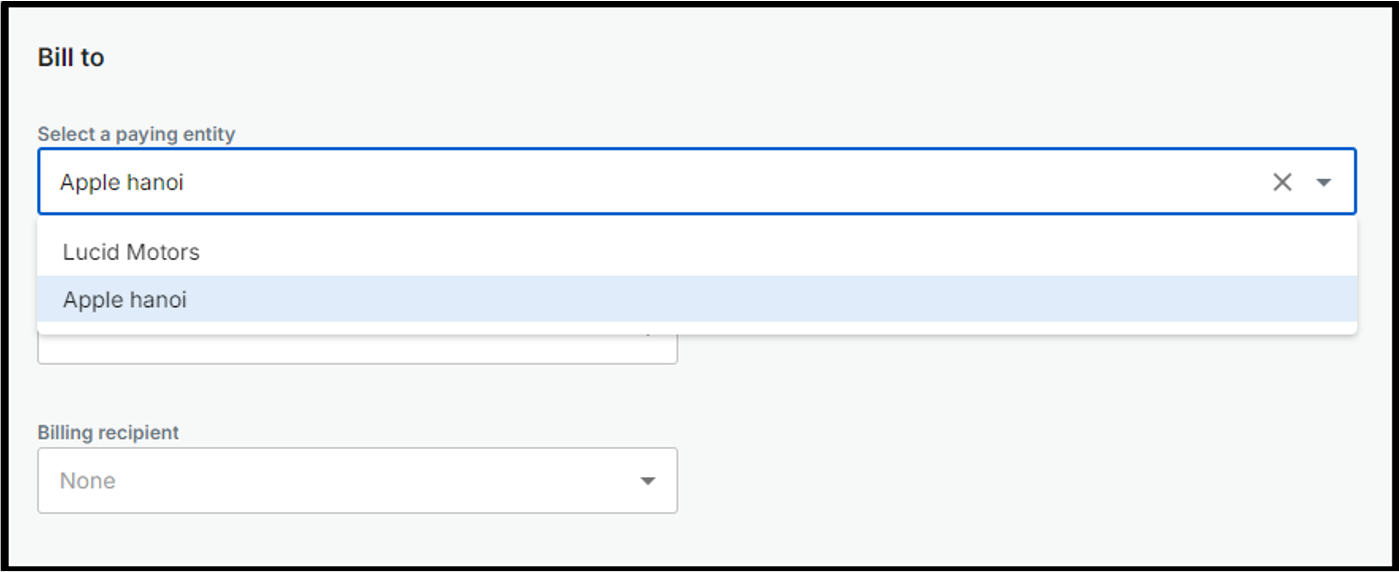
In case you would like to add the new paying entity, please make sure that the new clients or contacts must have at least a business relation (except “conflict “).
To add the new billing address or recipients, click on "Add new address" or "Add new billing recipient" within the Bill To section and complete the required information on the provided form.
Editing billing template
A billing template is required in the export settings section. To choose another billing template, please click on billing template and select the desired template from the available dropdown menu.
In case you add, edit, or remove a billing template from the available option, please contact your administrators, who have the authority to make the update on the billing template setting.
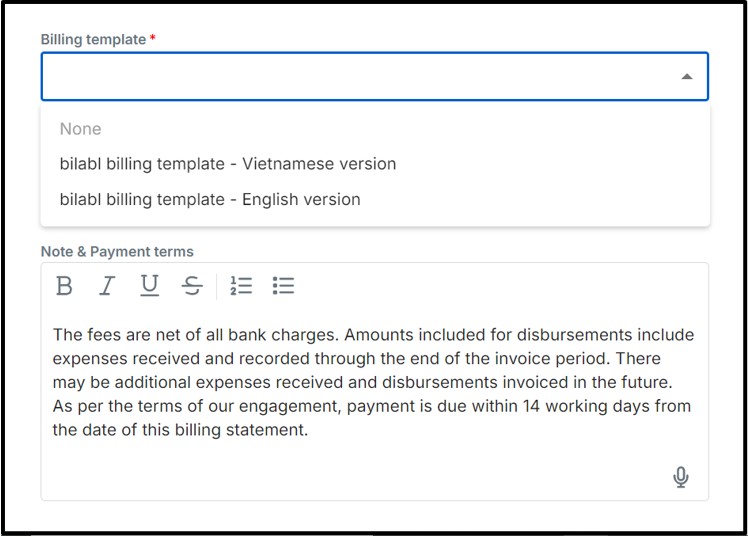
Once you choose the billing template, the Note & Payment terms will be automatically populated also.
To finalize your changes, click the "Save" button.