CREATE A CLIENT
In bilabl, contacts are categorized into two types: individual and corporate contact. Individual contacts encompass all business connections, such as clients or customers with whom you engage. Corporate contacts are legal entities through which the company seeks to initiate, develop, sustain, service, or advance a business relationship or transaction. You can access contact details by viewing the client card.
bilabl clients overview
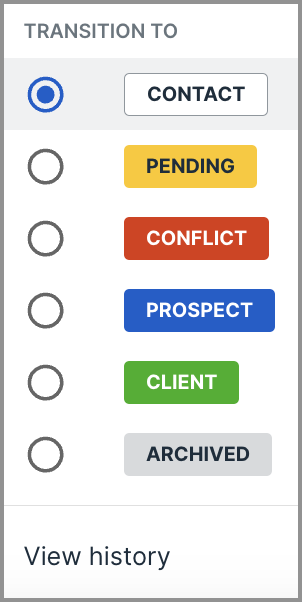
1. In bilabl, contacts progress through six stages
-
Contact: individuals or entities with whom the firm has communicated or interacted.
-
Pending: contacts awaiting review.
-
Conflict: a conflict check is being performed and if there is a conflict, the representation may negatively impact the firm's obligations to another client or a third party. It needs to be decided if the contact converts into a client or not and if a waiver is needed.
-
Prospect: potential clients under consideration.
-
Client: cases your firm has decided to take on.
-
Archived: contacts that are no longer clients or entities because they no longer exist e.g. due to closure or that is no longer a client.
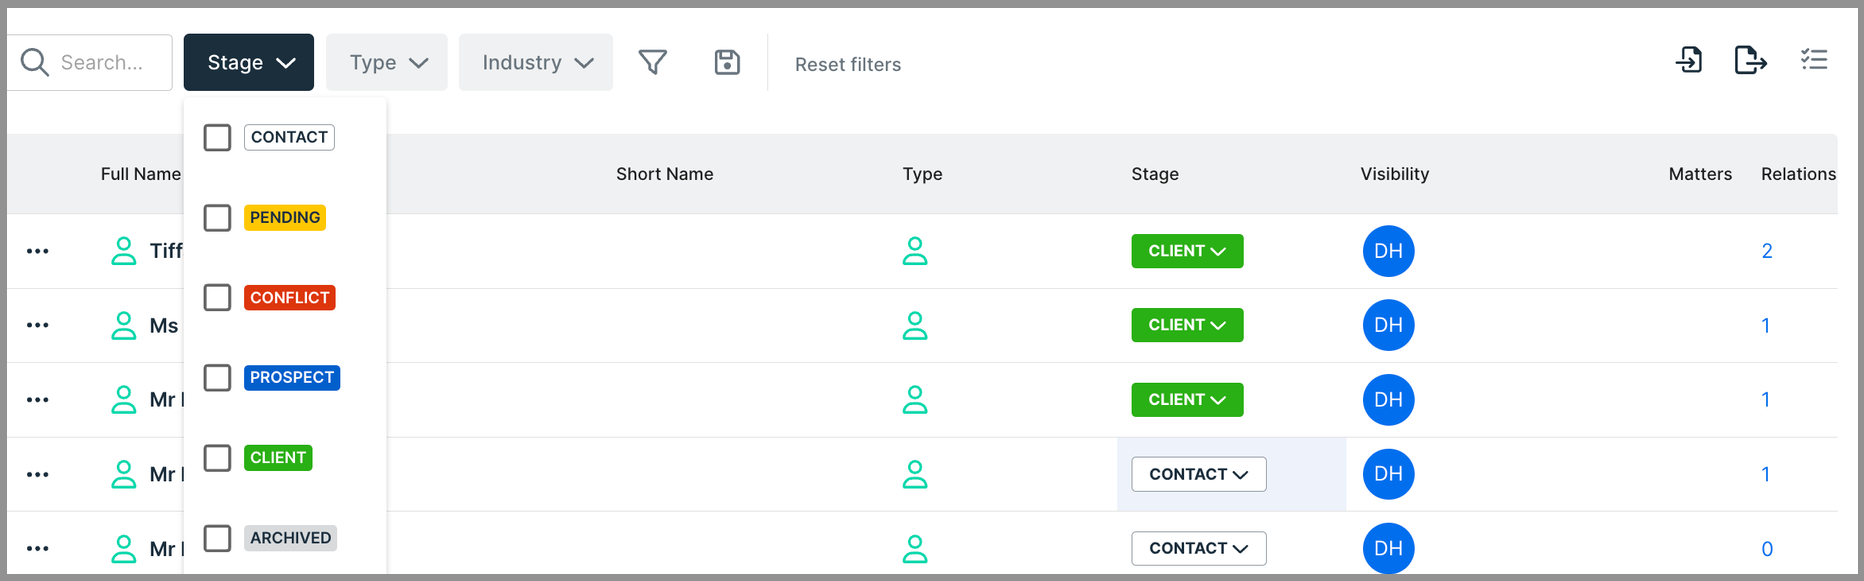
2. You can view clients by status once they have been created on the main client page:
- Go to client.
-
Choose from the status options: contact, pending, conflict, prospect, client, and archived.
-
Optionally: click "apply filters" to organize contacts based on specific parameters.
3. View all clients in client table
You can view your contacts on the main contacts page after creation or import:
-
Go to clients.
-
Use the quick filters to select either corporate or individual contacts.
-
Optional: click on "columns" to display specific columns. You can also rearrange columns by dragging them and clicking on each column to sort parameters in ascending or descending order.
-
Optional: click on "filters" to sort contacts based on specific filters.

Create a contact
1. Create a contact
You have the option to create either corporate or individual contacts, each containing vital information such as information, contact information, and visibility settings. A corporate contact can encompass employees or personal contacts. During the editing of a contact card, you have the flexibility to switch a company contact to an individual contact and vice versa. You can initiate the creation of a new contact in two locations: either from the main client tab or by using the add button.
1.1. Client tab
-
Go to client and select either add individual or add corporate.
-
Fill in the contact details.
-
Choose to either "save and continue" for additional information or "save and close",

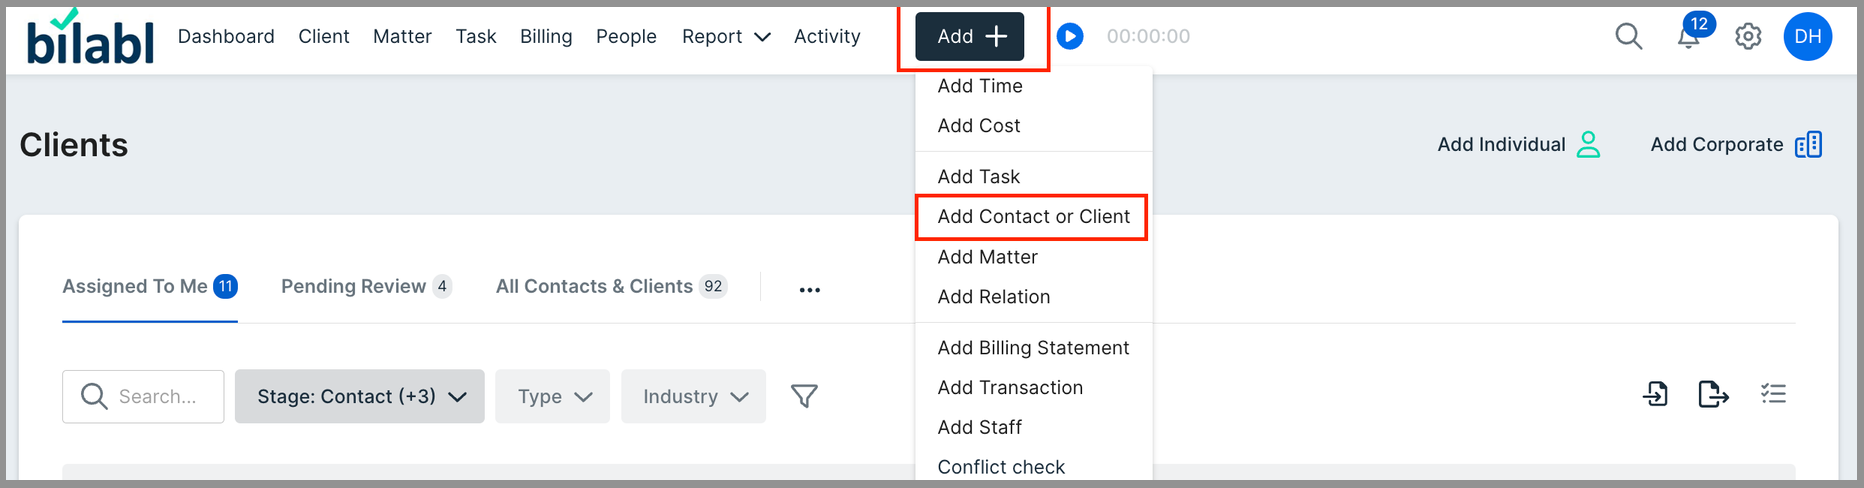
1.2. Quick add button
-
Click on add and choose add contact or client.
-
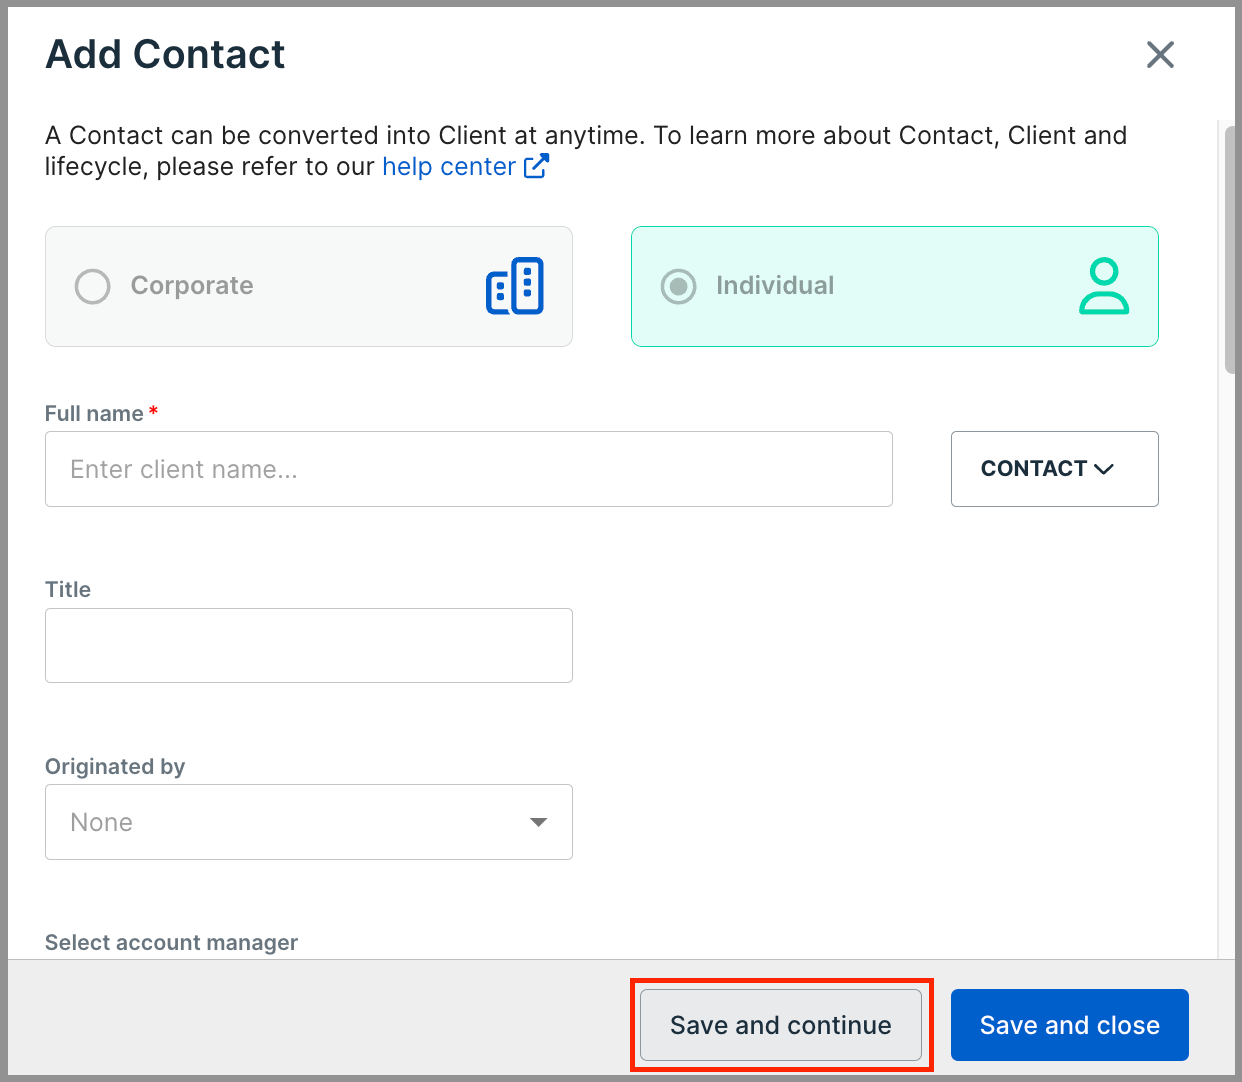
Select either corporate or individual.
-
Fill in the contact details
-
Choose "save and continue" if you would like to add more information or just choose "save and close.
2. Understand the distinction between ‘quick add’ and full form
2.1. Quick add form
The 'quick add' form allows you to swiftly create a new contact with basic information, including corporate/individual status, name, tags, contact details (email, primary phone number, Linkedin, website, fax number), and visibility.
Note: You cannot add an address using the quick add form
2.2. Full form
The full form is accessible when opting for ‘save and continue' when creating a new contact. This form provides additional fields and details beyond the essentials captured in the quick add form.
Beyond the fields covered in the 'quick add' form, the Full Form comprises more detailed information, categorised into three parts: general information, contact information, and visibility.
General information:
This section includes additional fields of information.
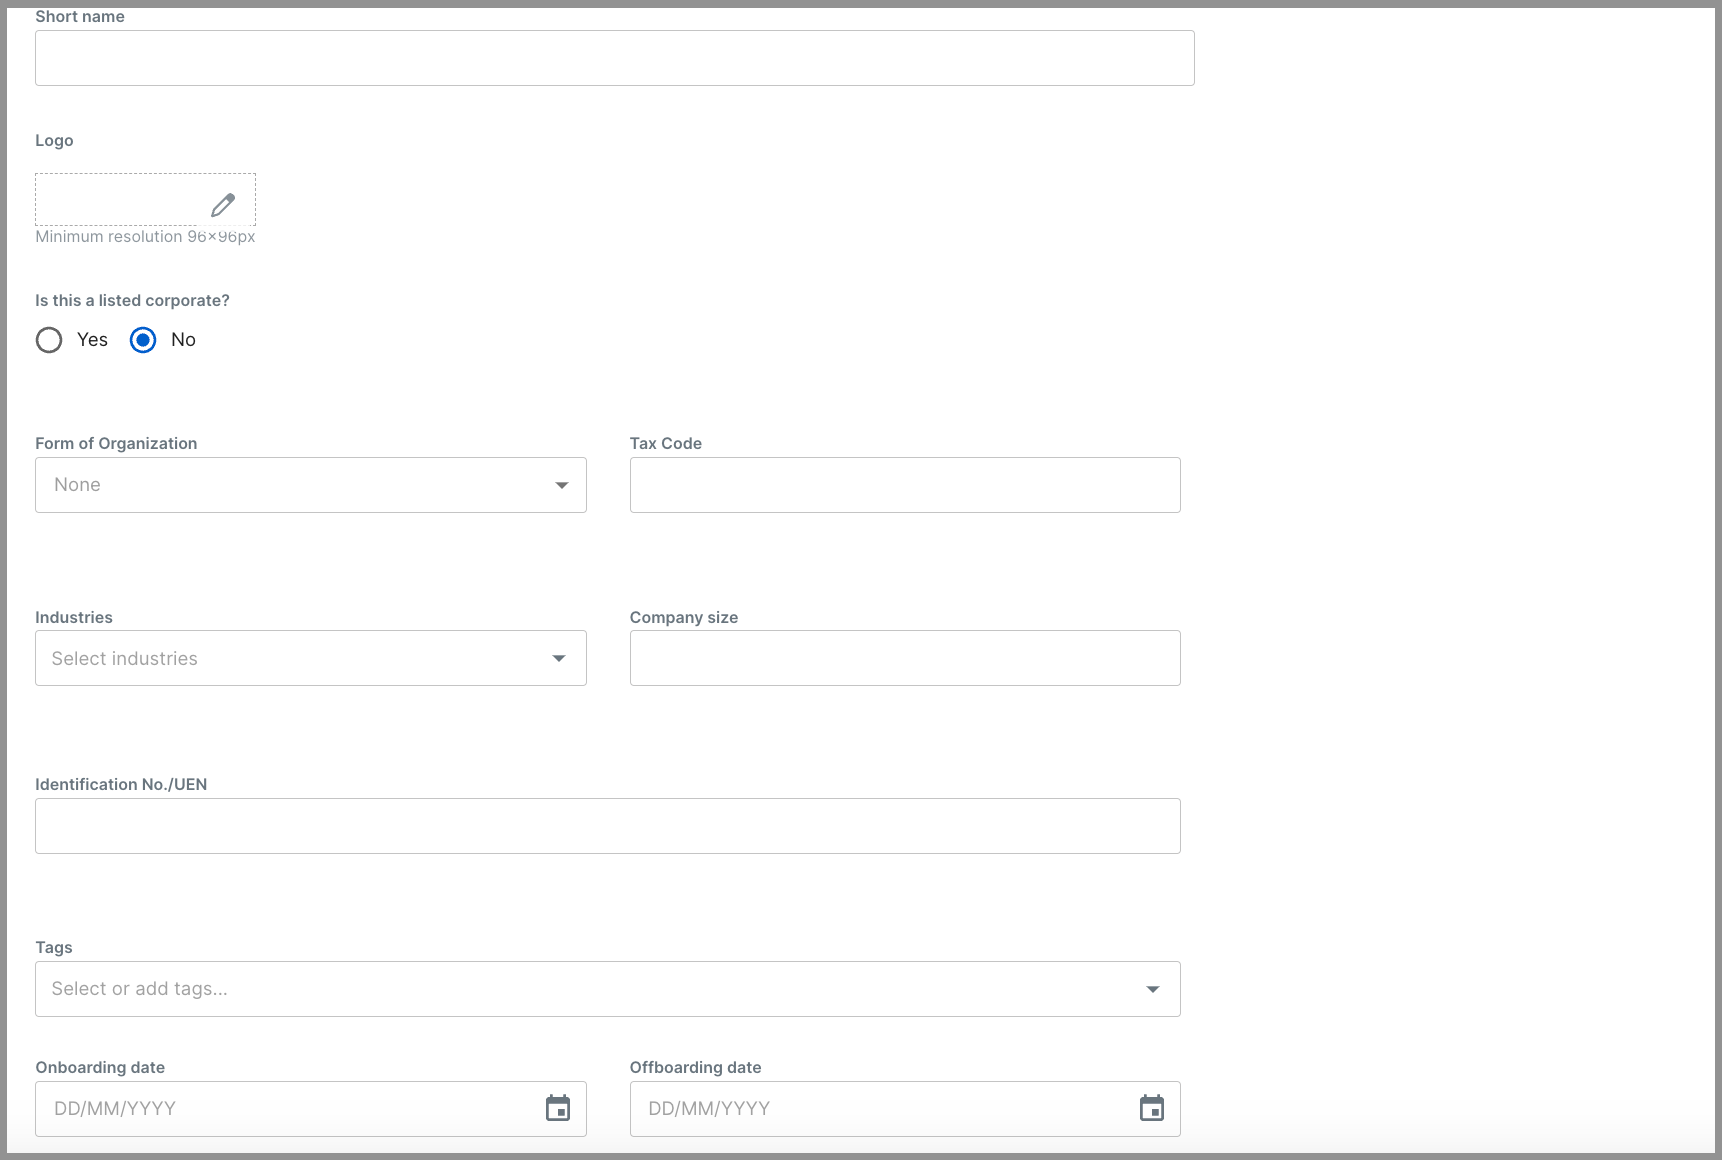
+ Corporate contact: type of corporate, form of organisation, tax code, industry, company size, identification no. or UEN, onboarding date and offboarding date.
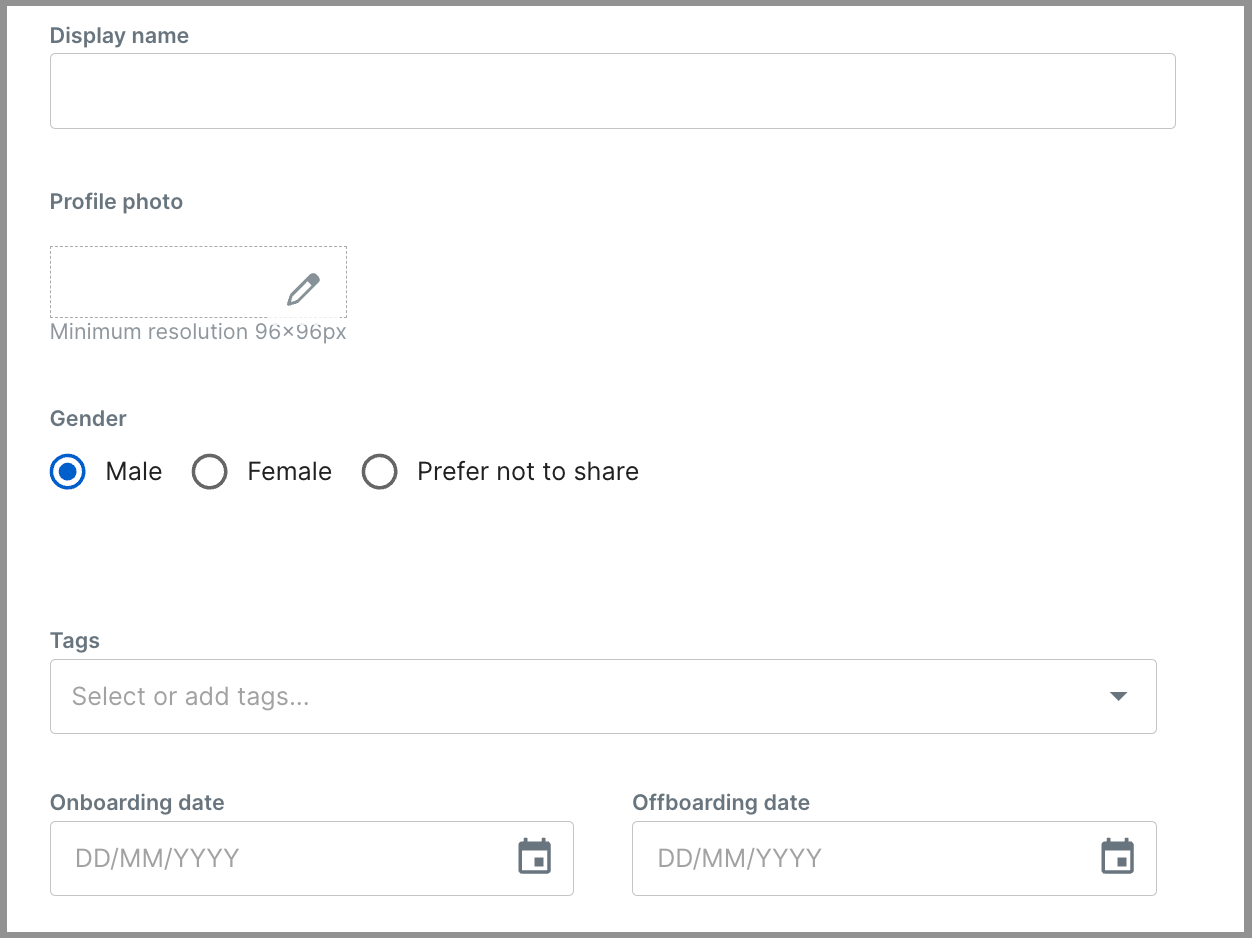
+ Individual: display name, profile photo, gender, onboarding date, and offboarding date.
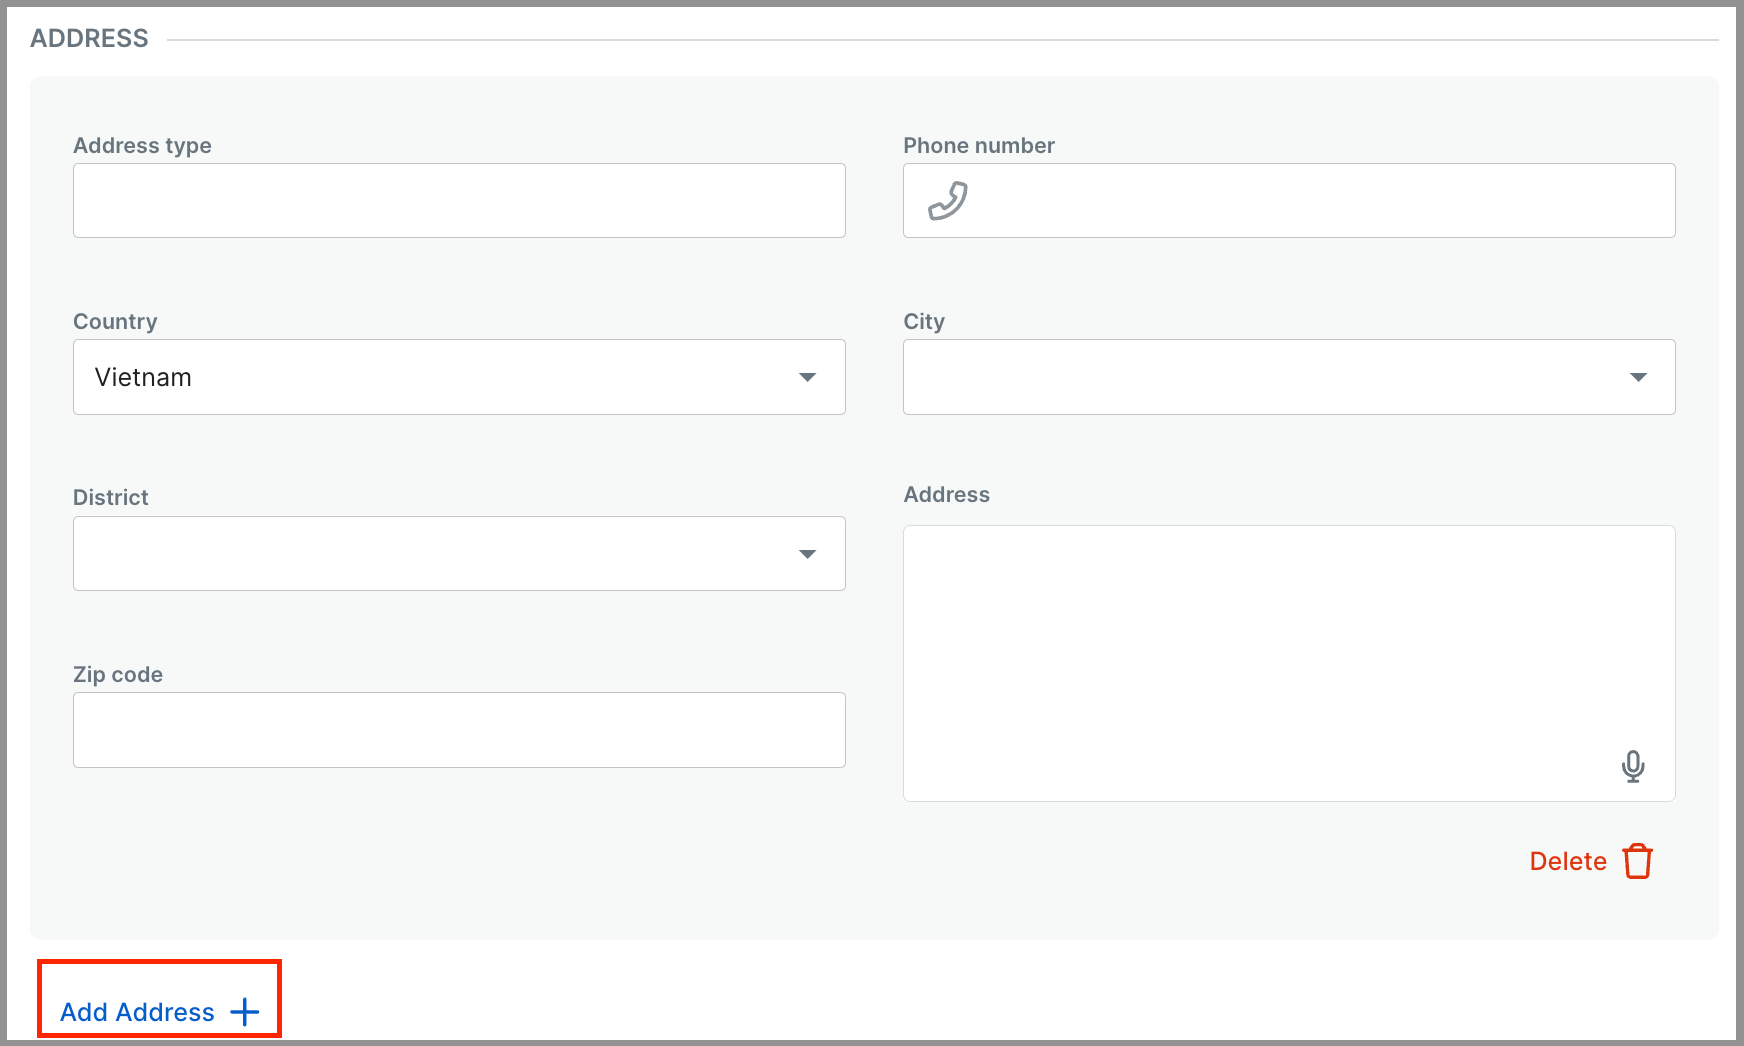
Contact information:
The full form option allows you to add the address of the contact.
3. Understand and complete contact form sections
3.1. General information
This section includes general information: contact’s name, originated by, account manager, logo, form of organization, industry, company size, identification no. or UEN, tags.
3.2. Contact information
This section focuses on capturing contact-specific details, including the contact’s address, email address, phone number, and website address.
You have the flexibility to add one or more addresses for comprehensive contact information. The primary email address and phone number will be prominently featured on reports and bills.
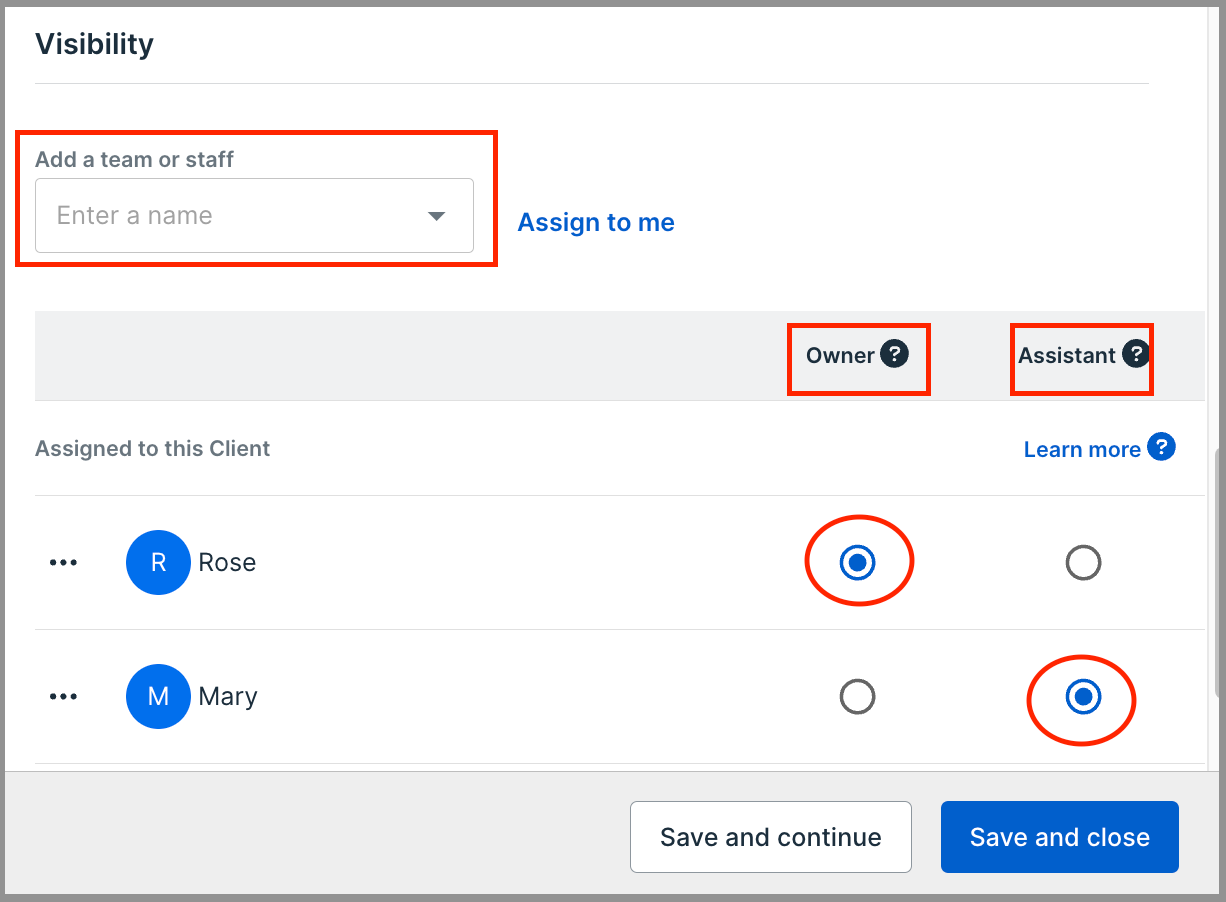
3.3. Visibility
This section is visible when creating a new company contact. Once an employee is added to the company's contact card, they can access this client. You can assign the employee a role, either Owner or Assistant:
-
Owner role: owners have full access to the assigned client, enabling them to edit/delete or generate billing statements.
-
Assistant role: assistants can add time, add costs to all matters of the client, include notes, and access the calendar.
Edit and Delete Contacts
You can edit and delete contacts. Once a contact is deleted, it can not be recovered
1. Edit contacts
-
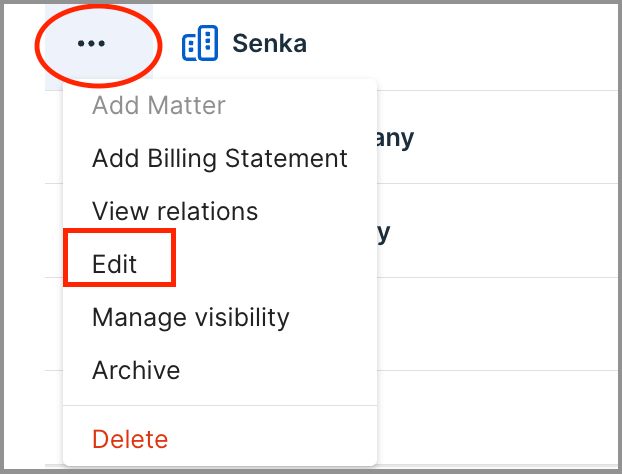
Go to client, select the contact you want to edit, click the (…), and choose edit. You can also use the search bar to find the contact and click "edit contact" in the contact's dashboard.
-
Make your changes.
-
Click save changes.

2. Delete contacts
It's possible to delete when the stage is set to "contact."
When you delete a contact, all associated contact notes and information will be permanently lost
-
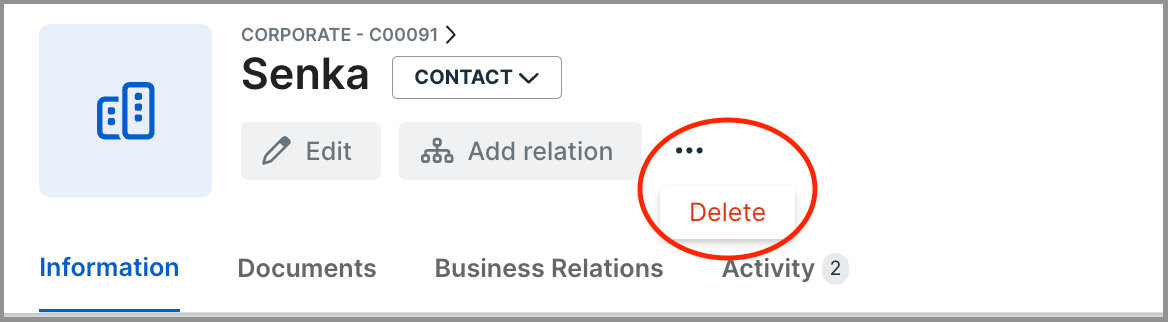
Go to client, select the contact you want to delete, click the (…) and choose "delete". You can also use the search bar to find the contact and click the (…) to delete.
-
Click 'delete contact.'
-
In the warning prompt, confirm the action by checking the box and click "yes" to delete the contact.

Filter, Export, Import Contacts
1. Filter contacts
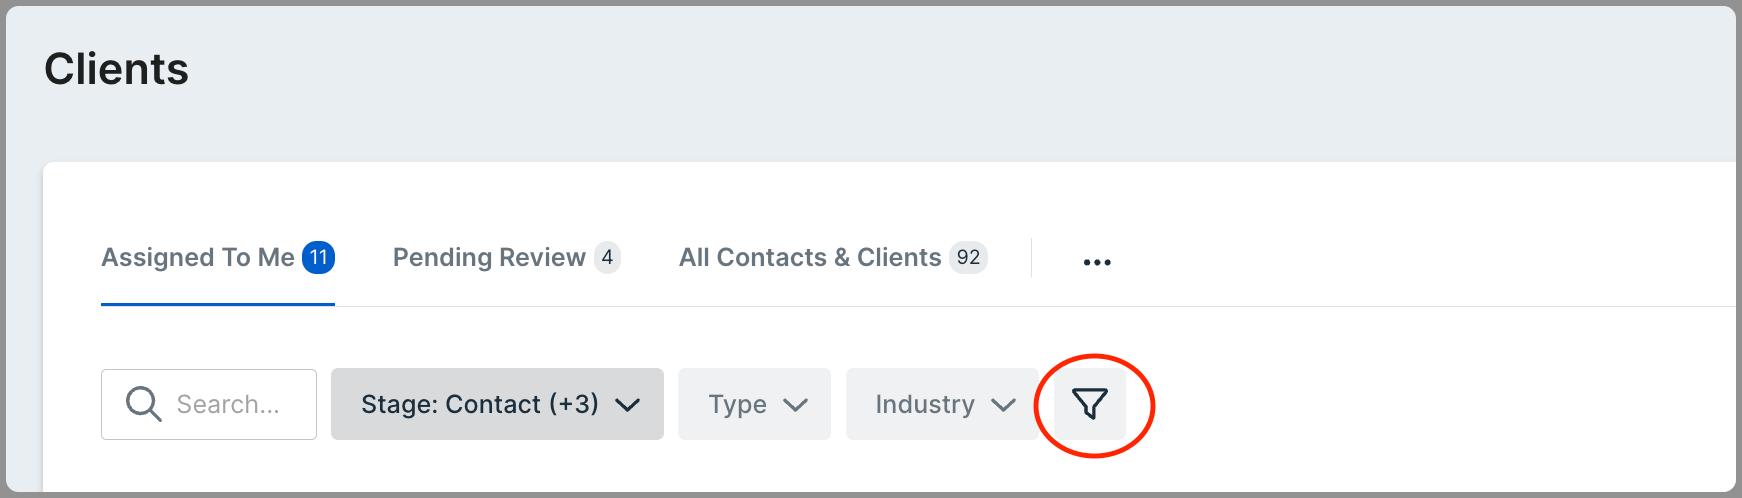
When filtering contacts, you can narrow down results by stage, type, and industry. Use the filter symbol for sorting options and the search field to locate a specific contact:
-
Go to contacts.
-
Click the filter symbol
-
Optional: use the search box to find a contact.
-
Select your filters.
2. Export and Import contacts
When exporting contacts from the main Client tab, only the data entered in the contact form during creation or editing will be included.
-
Go to Client.
-
Click on the Export/Import symbol on the right side.
Note: To import contacts, you can download a sample CSV from the import symbol

Understand contact details in bilabl
|
Name |
Explanation |
|---|---|
|
Individual Contact |
Your business connections or clients with whom you engage |
|
Corporate contact |
Legal entity with whom you engage |
|
Contact |
Individuals or entities with whom the firm has communicated or interacted |
|
Pending |
Contacts awaiting review |
|
Conflict |
Conflict: a conflict check is being performed and if there is a conflict, the representation may negatively impact the firm's obligations to another client or a third party. It needs to be decided if the contact converts into a client or not and if a waiver is needed |
|
Prospect |
Potential clients under consideration |
|
Client |
An individual or legal entity which engaged the firm |
|
Archived |
Contacts no longer clients or entities that no longer exist in the market (e.g., due to closure) |